shopping list
Here are some of the best deals for quality gf ingredients and equipment relevant to this recipe. You will need these items for this recipe, so at now extra cost you, if you purchase one of these products then I earn a small commission that helps fund more posts like this one!
Note: If you cannot see the ad links above it is because your have an ad block or tracker program on. Temporarily disable them to be able to click the links.
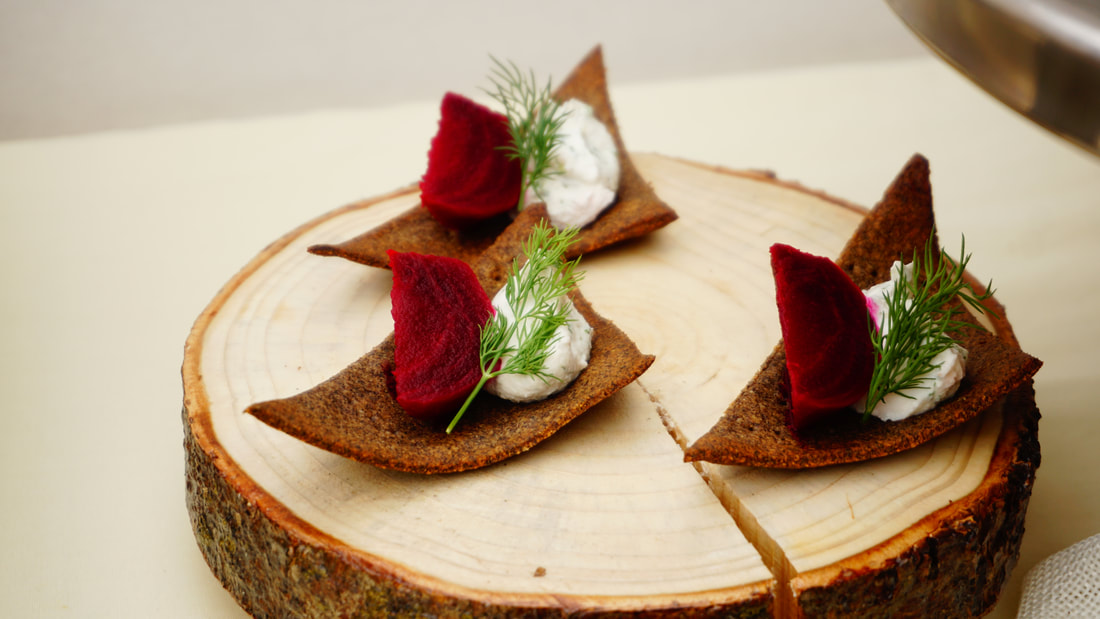
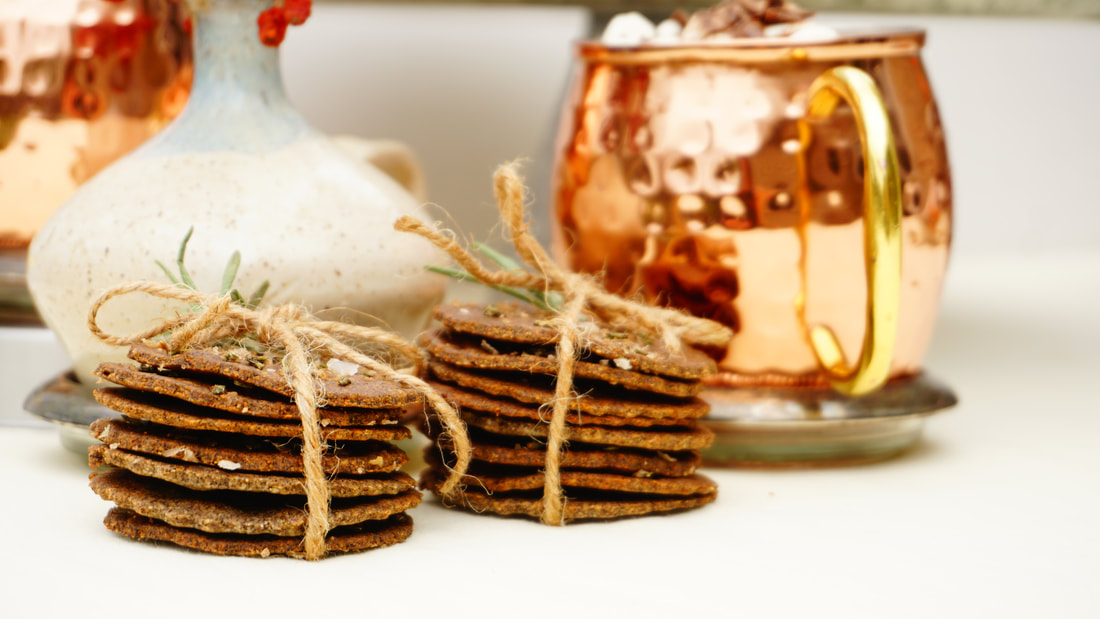
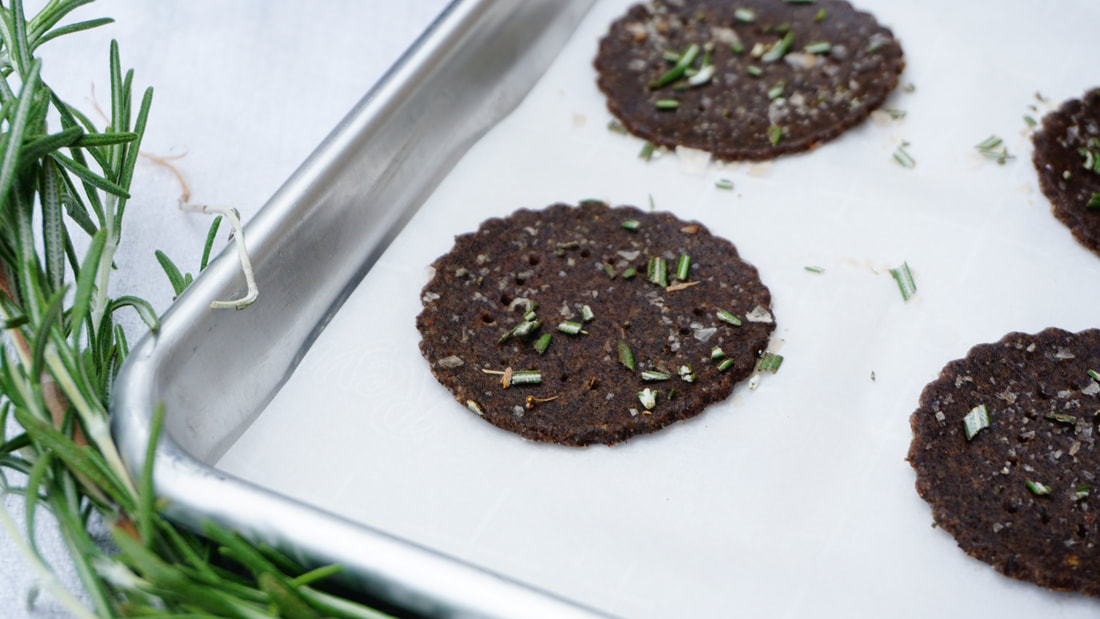
buckwheat -rosemary crackers
#buckwheat #gfcrackers #recipe
ingredients
method
Preheat the oven to 205°C (400°F). Line one large or two small baking sheets with parchment paper.
In a bowl whisk together buckwheat flour, almond flour, chia seed, sea salt, black pepper and chopped rosemary and set aside. Mix olive oil together with water and add to the dry ingredients. Bring together into a dough and knead on a surface until smooth. You can add a little water or flour, the dough should be nice and smooth, not sticky or too dry. Place one ball between two sheets of grease proof baking paper and roll out until about two millimetres thickness. Remove the top layer of baking paper and dock dough with a docking tool or fork. To "dock"1 a pastry means to prick dough with a fork every cenitmetre or so, this allows the steam to escape. Cut into desired shapes. The small your cut your crackers to the quicker they will cook. Chill crackers in the freezer for ten to fifteen minutes, this will make them easier to lift off of the paper. Transfer onto a prepared baking tray leaving a small distance between each cracker. Garnish as desired with salt and rosemary. Bake for ten to fifteen minutes, until lightly golden brown and dry throughout. Keep an eye on the crackers as the outer edges always bake quicker. You might have to move them around, so they bake evenly. Store in an airtight container for up to a week. Enjoy with your favourite dip or on its own.
Comments
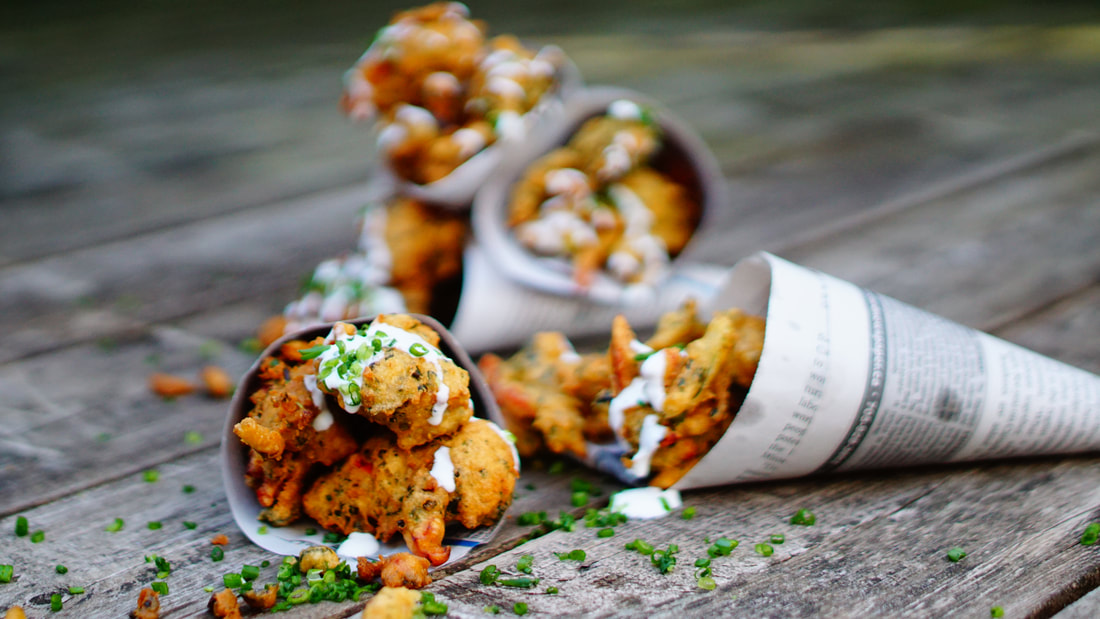
If you have never had this popular East Indian fried snack, pakora, you are missing out on something very special. These versatile savoury fritters can be used with an combination of vegetables!
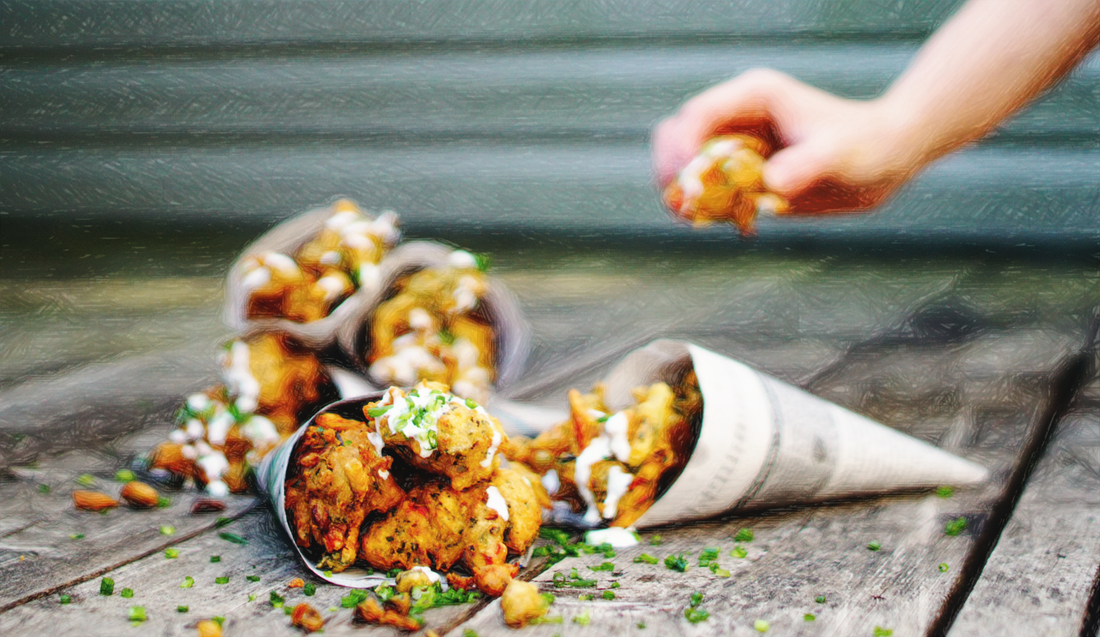
Perhaps fried food is not the healthiest options but with the shear amount of vegetables crammed pack in these little morsels I cannot help but feel healthier afterwards.
This recipe is what I would rank medium in the spice profile. If you like mild spice reduce the amount of of crushed called for to 1/4 of a teaspoon or omit it all together. If you like it eyeball tearing hot, than up the amount of crushed red pepper or even add minced ghost pepper to you batch! I like spicy food, but I prefer to have a spicy sauce on the sides rather than over power the flavour of the pakoras with spices. But it is up to you which is what make this recipe so terrific. recipe shopping list
Here are some of the best deals for ingredients and equipment relevant to this recipe. You will need these items for this recipe, so at now extra cost you, if you purchase one of these products then I earn a small commission that helps fund more posts like this one!
Note: If you cannot see the ad links above it is because your have an ad block or tracker program on. Temporarily disable them to be able to click the links.
Gluten-Free Summer Vegetable Pakora Recipe
#GlutenFree #DairyFree #HighFibre #Vegan #Vegetarian
ingredients
method
Have you ever known someone who has been afraid to go to the doctor’s office because they will tell them something is wrong with them? Naturally you have not been that person, right? But chances are you have heard this type of reasoning before. Yes?
Studies have shown that individuals with celiac disease may have increased anxiety after diagnosis. “FOR IN MUCH WISDOM IS MUCH VEXATION, AND HE WHO INCREASES KNOWLEDGE INCREASES SORROW.” – King Solomon, Ecclesiastes 1:18
When you know what food to avoid it is the road to healing but that does not instantly make it care-free. For individuals with a gluten-free medically restrictive diet, the kitchen transforms from a gathering place for fellowship to a place of great anxiety. So, what can you do to ensure a safe kitchen for your gluten-free family member or guest to avoid gluten cross contamination?
How about we start with the basics? 1) EDUCATE YOURSELF
You cannot begin to protect your loved ones with a kitchen safe from gluten cross contamination if you don’t understand what gluten is. You know what I mean?
Gluten is a protein found in wheat, rye and barley (for a complete list of gluten containing foods, see page xx). Individuals diagnosed with celiac disease and other gluten intolerances can become very ill from ingesting gluten. For celiacs, even a crumb of glutenous food can cause damage to the small intestine. Celiac related illness is broader than the uncomfortable inflammation of the intestine, it can mean poor brain function, skin ailments, and interact closely with many auto-immune disorders including osteoporosis, Alzheimers, and diabetes. While symptoms related to gluten contamination are often less severe than when expressly eating gluten, it can still harm gut health and prevent long-term healing. Not good. The level of gluten intolerance and gluten sensitivity varies from person to person. Experts classify celiac disease patients as not being able to digest gluten in quantities of over 25 parts per million. That means if you had a 50 gram slice of toast there could be only 0.00125 grams of gluten in, or on, that toast for a celiac patient to not have damage done for their small intestine. This is a small amount of gluten but effects a large segment of the population. It is currently estimated, one percent of the general population is celiac, so chances are, you may be faced with cooking for an individual with celiac in your home. So keep reading! 2) CLEAN EVERYTHING IN YOUR KITCHENfind good prices on colourful cleaning clothes, rags, and sponges
|

 |
Out of curiosity I checked around and found these gluten and gluten-free colour coded cutting boards! Just the thing you will need to set up your celiac friendly kitchen.
|
· Wooden cutting boards and utensils, wood is porous so gluten proteins can easily hide in them-thar cracks. If you are in love with wooden cutting boards, you do not have to say farewell just yet. Instead, try colour coding your cutting boards. If you know a woodworker, you could even request that the words “gluten-free” carved into the board.
· Colanders and strainers, it is super easy for gluten to get trapped in those tiny drain holes.
· Toasters, waffle irons, etc., alternatively consider using a toaster oven for safe gluten-free toast.
· Plastic mixing bowls and utensils that at are old and scratched.
· Whisks and beaters, gluten can easily get trapped in the many hard to clean places.
· Cooling racks. Unless you never cool your products directly on the rack, gluten can easily hide in various bumps and cracks.
· Non-stick cookware, especially if scratched
· Cast iron and baking stoneware, gluten can become easily trapped in the porous surface. In addition, proper care of cast iron dictates you should not wash thoroughly.
· Muffin tins, unless you faithfully use muffin cups
· BBQ grills, it is super common for cross contamination to occur on one of these, due to grilling hamburger buns, brushing wheat-containing BBQ sauce on ribs, grilling glutenous weiners, and more. The grills are an appliance you likely cannot splurge on to have a duplicate. So why not buy a grill mat for gluten-free items? The added benefit of a grill mat is they are super easy to bring with you anywhere, be it a family campsite or backyard BBQ with friends. It is a good idea when someone else is the grill master to provide them with a second set of grill tongs and spatula so they do not flip your gluten-free bun on your gluten-free grill mat with dirty tongs that have been touching glutenous hamburger buns all day.
 |
Found these gluten collapsible and colour coded colanders, which is a great idea because if you are going to be investing in multiple cutting boards, colanders, utensils, etc you are going to need ever space saving gadget there is! Check product out.
|
When utensils are dipped in a condiment jar, spread on bread, and dipped back into a jar, the condiments are contaminated with crumbs. To ensure a safe kitchen, buy condiments in squeeze bottles or transfer them into ones. I suggest waiting until you leave the grocery store before transfering your jelly to a squeeze bottle. Har, Har. If squeeze bottles do not strike your fancy, you will need to buy duplicate condiments and label the gluten-free one very clearly. A few of the common foods you should consider buying in squeeze bottle form, or duplicates of, are:
· Butter, if you are hosting a gluten-free guest, cut their butter off of a fresh stick or consider butter packets.
· Cream cheese and any other spreads
· Honey
· Jam and Jelly
· Mayonnaise
· Mustard
· Peanut butter and any other nut butters
4) RISE ABOVE IT ALL
A word to the wise, label your shelves as “dedicated gluten-free” to remind everyone not to put their glutenous food in this space.
5) BAKE & SERVE SEPARATELY
When serving food, serve the gluten-free food first. This helps ensure gluten crumbs do not drop into gluten-free foods. But it is also a good idea for celiacs to use separate serving utensils. Consider colour coding so these don’t get used for wheat products.
If you are gluten-free and at a pot blessing or another buffet scenario, ask the host if you can go first to help ensure there is no accidental gluten cross contamination through the switching of spoons in dishes.
And there you have it, five simple but thorough steps to safely serving the celiac in your life. Your family support is invaluable in their journey.
Have a blessed day friend.
By par-cooking your apples in a controlled manner, the activity of a enzyme which converts pectin into a more heat stable form, increases in activity between the temperature of 140°F and 160°F.
“Very much like curing the cement mortar in between the bricks in a wall and allowing... it [to] fully harden. Once your apples slices have been treated in such a manner, subsequent baking will tenderize them, but still allow them to maintain their shape.” - J. Kenji Lopez, The Food Lab
shopping list
|
|
|
|
|
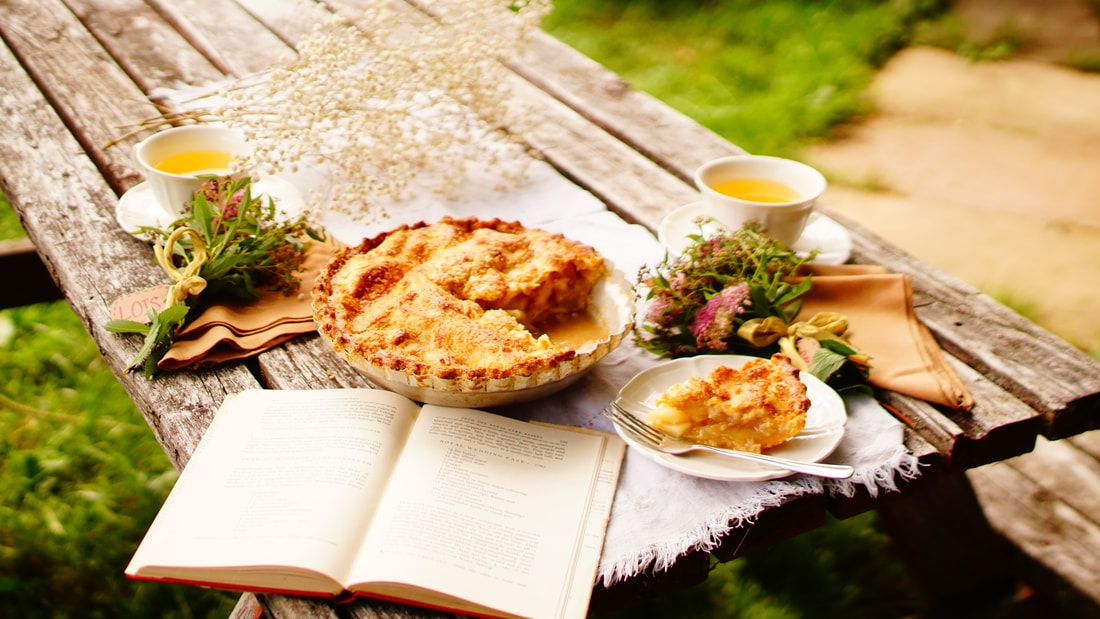
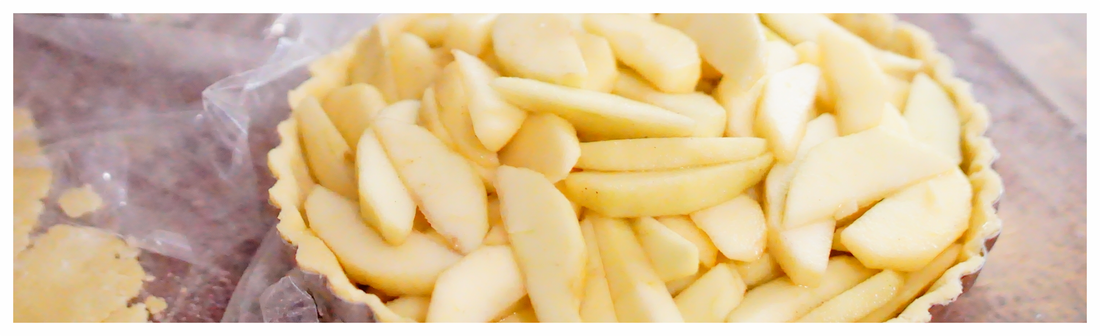
The Best Gluten-Free Apple Pie Recipe
ingredients
1.6 kilograms granny smith apples
1 litre apple cider or water
100 grams granulated sugar
15 grams arrowroot starch/flour
1.25 millilitres ground cinnamon
1.25 millilitres kosher salt
garnish
1 large egg, lightly beaten
coarse cane sugar or xylitol
method
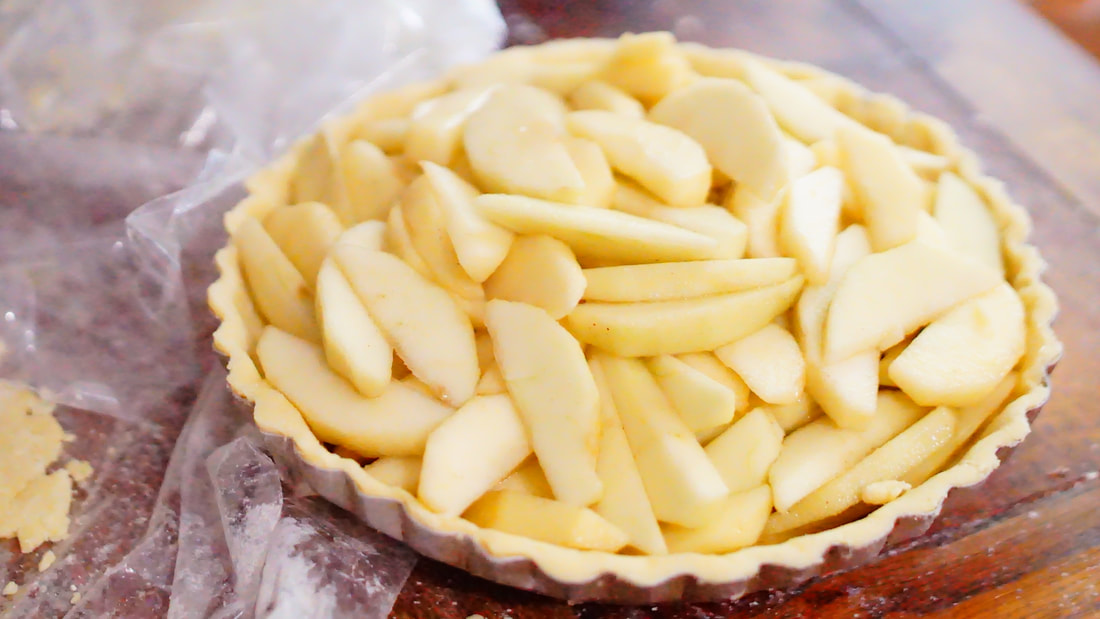
Peel and core apples. Place the apple peels, and cores in a pot with the apple cider. Bring to boil. Meanwhile, begin slicing your apples into six millimetre (1/4 inch) wedges. Place your apple slices in a large mixing bowl. Strain the peels and cores out of the cider. Pour the boiling hot cider over top the apple slices. Cover and set aside at room temperature for ten minutes. Drain apples well (reserve the liquid for a cup of extra apply cider) and let sit in a colander in the sink, tossing occasionally until completely dry, about ten minutes.
In a large bowl whisk together the sugar, arrowroot starch, cinnamon, and salt. Toss the apples in the sugar mixture. Set aside.
Between two sheets of parchment paper, or thick poly plastic, roll Roll one disc of pie dough into a circle roughly 30 centimetres (12 inches) in diameter. Peel back the paper/plastic occasionally to keep it from sticking on the dough. Flour any sticky spots on the dough as needed. Transfer to a nine inch pie plate. Brush the rim of the pie with some of the lightly beaten egg. Add the filling. Set aside in the refrigerator.
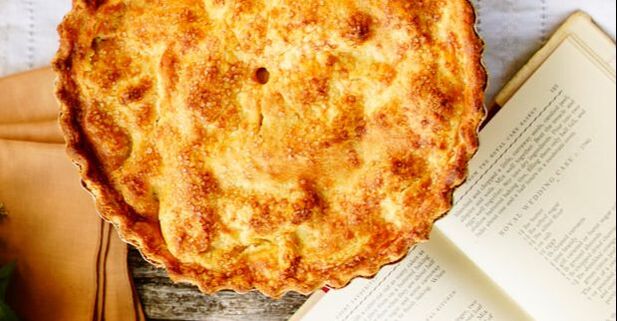
Roll the remaining disc of pie dough into a circle 30 centimetres (12 inches) in diameter. Transfer to the top of the pie. Using a paring knife trim the edges of both crusts until they overhang the edge of the pie plate by just over a centimetre (1/2 an inch) all the way around. Fold the edges of both pie crusts down and together, tucking them in between the bottom crust and the pie plate and working your way around the pie plate until everything is well tucked. Use the forefinger of your non-dominant hand and the thumb and forefinger of your dominant hand to crimp the edges.
Use a pastry brush to brush an even coat of lightly beaten egg all over the top surface of the pie. Cut a few slits in the top crust with a sharp knife for ventilation. Sprinkle evenly with a bit of coarse sugar.
Bake until lightly golden brown, about 20 minutes. Reduce heat to 190°C (375°F) and continue baking until deep golden and filling is bubbling, about 25 minutes longer. Remove from the oven and allow ro cool at room temperature for at least two hours before serving.
Never loose sight of the 'why.' Why are you on a gluten-free diet? Not because you have to be but because you want a better life, one without brain fog, dermatitis herpetiformis, bloating, diarrhea, depression, auto-immune disorders.
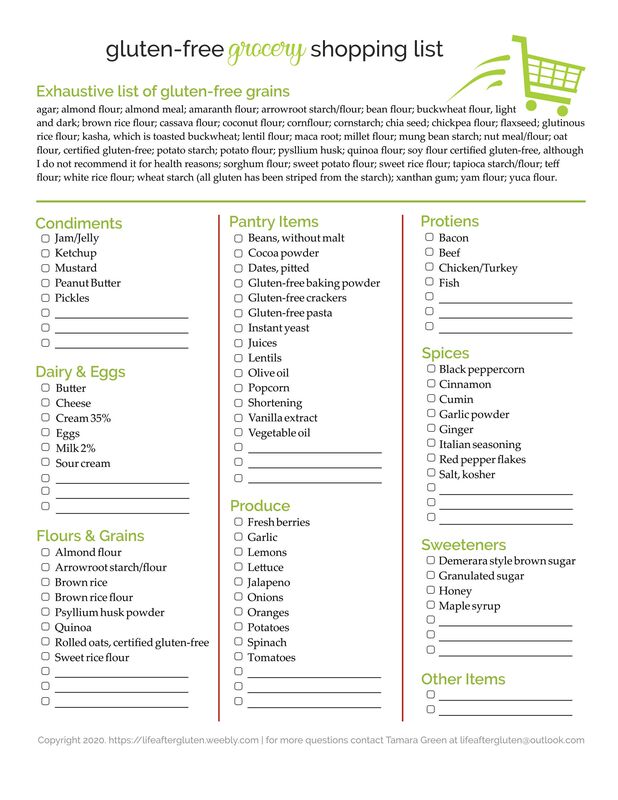
Weekly GF Grocery Shopping List
I suggest, printing the list and laminating it because then you can mark it with a dry erase marker and you will be able to reuse the same list a hundred times!

Glutenous groceries shopping hot spot list
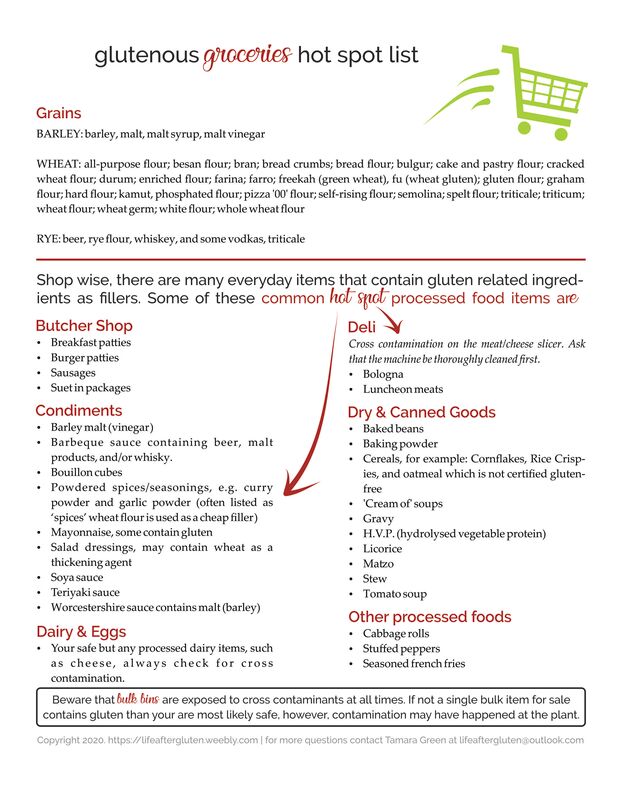
Download the complete gf shopping guide
However, because I have particular tastes that causes me focus on what makes a pie crust good.


shopping list
 |
 |
 |
good n' flaky pie dough recipe
ingredients
115 grams yellow corn flour
100 grams arrowroot starch or tapioca starch/flour
65 grams white rice flour
8 grams xanthan gum (optional)
270 grams butter, chilled
75-90 grams buttermilk/water, ice cold
15 grams granulated sugar (optional)
8 grams kosher salt
method
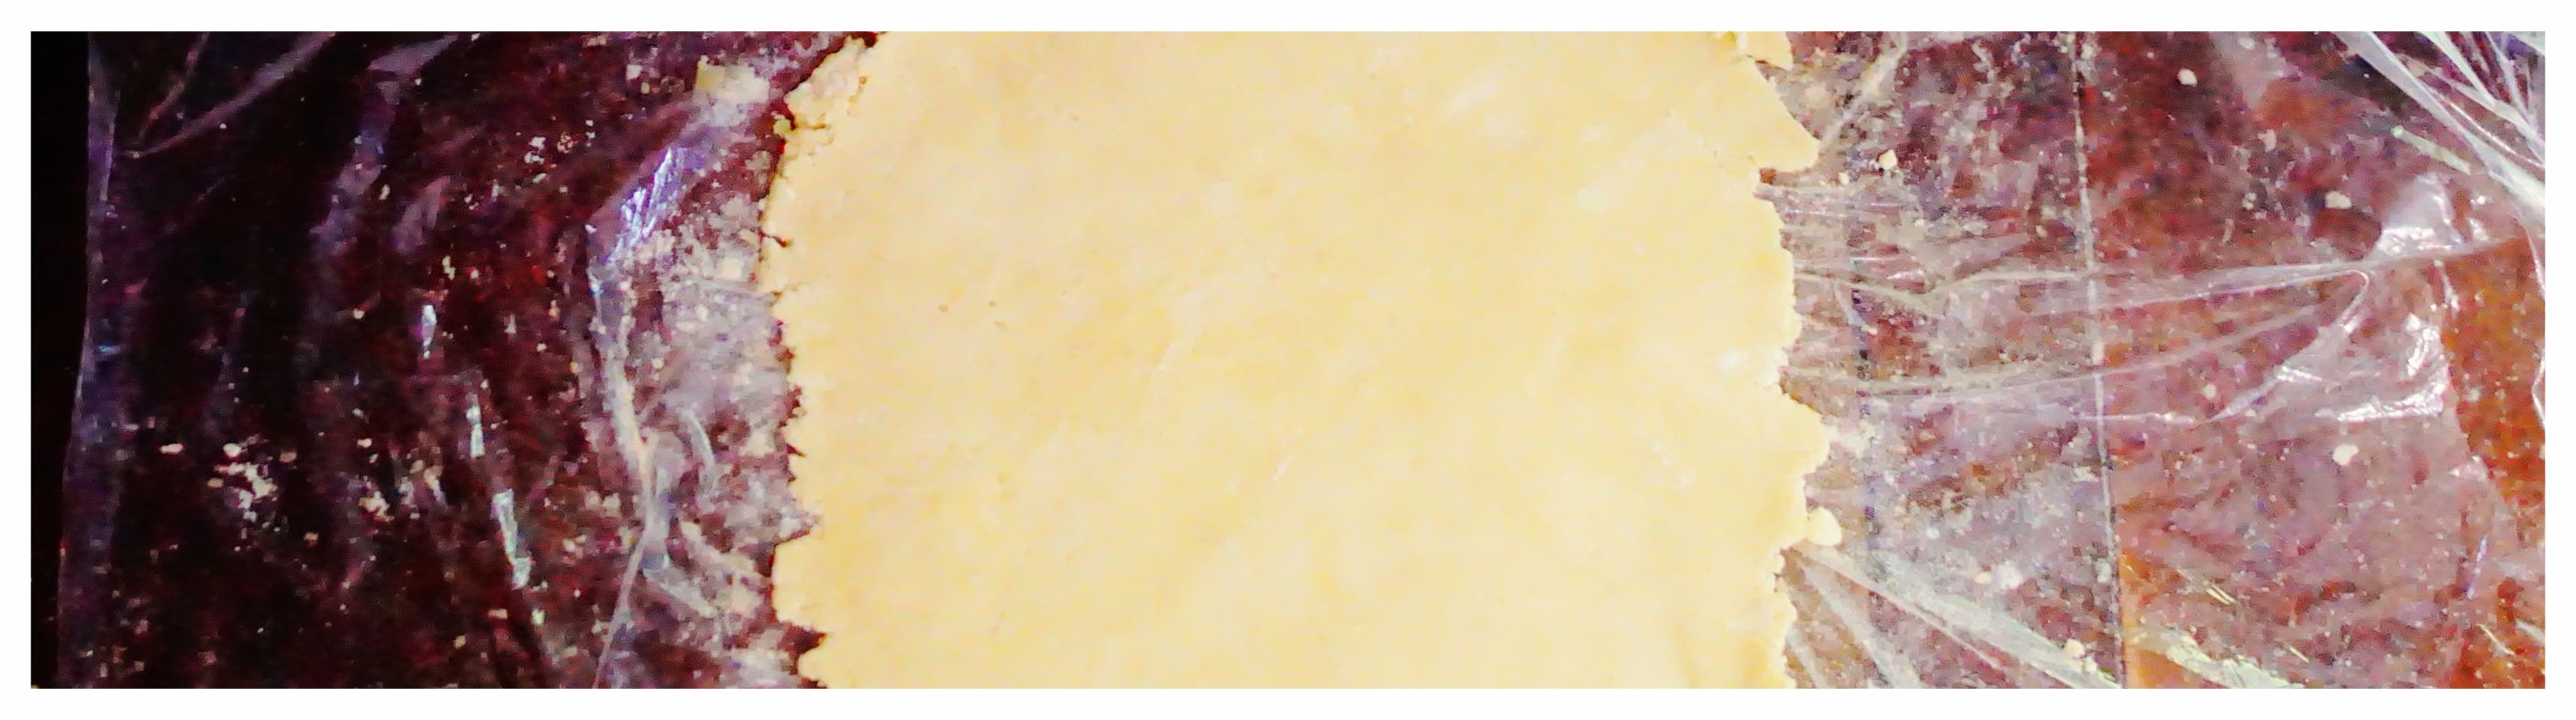
Whisk the sugar, salt, and 380 grams of the sifted flour mix in a medium bowl. Cut the butter into 15 millimetre (1/2 inch) cubes. Toss the butter cubes in the dry ingredients to coat them. Dump the mixture out between two larger sheets of parchment paper or thick poly plastic. With a rolling pin, roll the butter into the flour until it is in long flexible strips (see picture 2nd picture in this post), using a bench scraper to scrape the butter off the parchment/plastic surface as needed.
Remove the top piece of parchment/plastic. Gather the mixture into a loose pile, then drizzle with the buttermilk. Using your hands and the bench scraper, toss the mixture until the buttermilk is evenly distributed, than gather into a rectangular pile (see picture 3rd picture in this post).
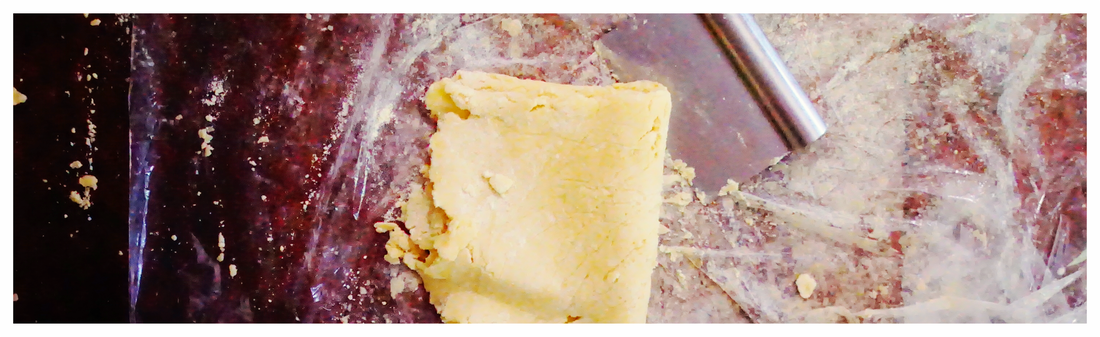
Cover again with the top piece of parchment/plastic. Roll out the dough to a large square (see picture 4th picture in this post). Uncover. Fold into quarters (see picture 5th picture in this post). If will be crumbly and loose; do not panic.
Roll out again. Fold in quarters. Wrap in plastic wrap and chill for a minimum of half an hour, until malleable but not sticky/damp. You can keep the dough in the fridge for up to five days and in the freezer, well wrapped, for a whole month.
In fact it can be down right frustrating at times when a beloved brand re-formulates their recipe and all of the sudden it contains wheat. Sometimes, however, this is not the result of re-formulation but of greater label transparency. What used to hide under the auspices of "spices" now is being called out for what it is: wheat flour.
Half a decade ago Forbes magazine published an article contributed by the Hartman Group projecting gluten-free product sales to go up $2 billion over the next couple or years. Well meet the projected future. One out of four homes purchases gluten-free foods (to be clear the homes are not the entities actually doing the purchasing that would be a scary future I hope Alexa never makes that possible). 25% is no drop in the bucket percentage! And thankfully food producers have caught on, some in the way of now declaring wheat on their labels others by re-formulating their recipes to brand their original item as gluten-free or made without wheat products. Which is great news, no?
It is great news, yes. However, this swing in product recipes and labeling shed light on a set of challenges celiacs and the gluten sensitive have to face everyday... paranoia. Products on the shelves are always changing sometimes they rebrand to warn you of this but sometimes the package looks deceivingly identical.
How does a gluten-free shopper face this?
Know how to identify red flag ingredients
I am posting a blog series on identified these red flag ingredients. Each post will contain a list of a specific category of ingredients (grains, meats, condiments, etc.) you can print out or bookmark as a handy shoppers' reference card. To find more blog posts on this topic, navigate to the Life After Gluten blog page, in the side bar labeled "Categories" click "Starting GF Diet."
Happy shopping friends!
Tamara Green


Happy to meet you,
If you are that person with a million and one allergies and intolerance I am there to say you are not alone! Life After Gluten can be better than life with wheat. Living lactose-free since 2007 and gluten-free since 2013. Also intolerant and/or allergic to mushrooms, soy, and yeast.
Your Blogger, Tamara Green
Categories
All
About Gluten
Autumn
Baking Advise
Best Hot Chocolate
Beverage
Bread
Breakfast
Cake
Charity
Christmas
Cookbook
Cookie
Dairy Free
Dairy-free
Dessert
Dinner
Grocery List
Holiday's
Hungarian
Lunch
Menu
Pastry
Pie
Plating
Product Review
Recipe
Review
Squares
Starting GF Diet
Summer
Thanksgiving
Utensils
Video
 RSS Feed
Archives
March 2024
March 2022
February 2022
November 2021
June 2021
December 2020
November 2020
October 2020
September 2020
August 2020
July 2020
May 2017
April 2017
August 2016
June 2016
May 2016
April 2016
March 2016
February 2016
January 2016
December 2015
November 2015
October 2015
September 2015
August 2015
July 2015
June 2015
May 2015
April 2015
