This recipe is based off a GF pita recipe I used bake in October when making a traditional Greek meal GF (find recipe here). I highly recommend giving both this bun recipe and the pita recipe a try because there both definite keepers! Infact I recommend making them in large batches and freezing them (uncooked, they will still rise after being thawn). Or, mix up the drys in batches ahead of time, so that it will be quicker when you go to make either these recipes (note the pita recipe has 1/2 cup more Oat Flour). Ingredients
Comments
Making homemade pastry, be it puff, flaky, choux, etc., is a definite skill that is only perfected with practice. Pastry of any kind is possibly the hardest item to make gluten free, I dare say "much harder than bread." Also, likely for this reason, one of the more rare prepackages GF items to find in a store. This can cause server withdrawal for this who loved to go their local bakery and buy a danish, sausage rolls, or crescents rolls prior to staring a GF lifestyle. Well this recipe, like all pastries takes some dedication to prefect, but trust me it will be worth it in the end. From my experience there are three keys to pastry:
READ CAREFULLY BEFORE PROCEEDING PREP.
First combine into a container, with a tight fitting lid:
MAKING THE DOUGH Sift into a food processor:
THE BUTTER PACKET Cut into 1/2-inch cubes and freeze for 5 minutes:
ROLLING THE PASTRY Remove the dough square from the refrigerator (leaving the butter packet in the refrigerator) and place on a sheet of lightly floured parchment paper (or wax paper or plastic wrap). Flour the top of the dough square and place another sheet of parchment paper on top of the dough. Roll out dough into a 13x8-inch rectangle, with the 8-inch side facing you. Brush off excess flour. Remove butter packet from the refrigerator, unwrap it, center it on one half the dough. Fold the over the butter, completely covering it (remove the top sheet of parchment paper and try lifting the bottom sheet half way the loosen dough). Turn the dough so that the folded edge is on the left, with one of the sealed sides (where the dough was pressed together) on the right, to change the direction for the next roll. Flour as needed from here on. Place the top sheet of parchment paper back on. Roll the dough package into a 17x7 1/2-inch rectangle, keeping a short facing you. Slide a metal dough scraper or spatula or a large knife under the bottom of third of the third of the dough and fold it up over the center of the dough. Slide the knife under to third of the dough and fold it down on the top of the first third, as though you were folding a business letter. This rolling and folding is called a single turn. Rotate the dough so that the folded edge is on the left, and roll the dough out once more into a 17x7 1/2-inch rectangle. This time fold the bottom end up and the top end down to meet the center (do not overlap), then fold the dough in half, to make 4 layers of dough. This double fold is the second turn. Mark your dough with two finger imprints to remind you that you have given the dough two turns. Wrap up the dough and refrigerate for 45 minutes. With the folded edge on the left, roll the dough out again to 17x7 1/2-inches. Make another double fold, for the third turn. Mark your dough with three finger imprints, wrap the dough, and refrigerate for 45 minutes. Roll the dough out and make another double fold for the fourth turn. Mark the dough with 4 finger imprints, wrap, and refrigerate for at least an hour before using.
This comfort food is a traditional French Canadian Christmas pie called: Beef Tourtiere. All though it's called All Beef Tourtiere it's commanally made from a combination of pork and beef, and traditionally with carrier pigeon. But to offer a heartier and healthier alternative I offer my version of this wonderful winter dish, with no pork just beef. However, if you like pork go ahead and use half pork and half beef!
This pie is best suited for the cold seasons because it's loaded with what are termed warming spices. Warming spices are those spices which actually do warm your blood. Here are some examples of warming spices: ginger, nutmeg, cinnamon, cardamon, allspice. I offer my humble alternate definition of warming spices: heart warming spices; i.e. those spices which a reminiscent of what mother used to make on a cold day (e.g. applesauce cake, gingerbread, and pumpkin pie)! Between hearty beef and heart warming spices this is a sure crowd pleaser. The wonderful array of flavours all coalesce in this warming dish. The ingredients are many but the taste is divinely simple, and in fact the recipe is quite easy to compile. Anyway enough of my chitter-chatter go ahead try the recipe for yourself, and please when you get a minute let me know what you think of it in the comments below!
Double Crust Pie Dough (SEE RECIPE HERE)
2 lb. Ground Beef (Blade Roast is adds a deep beef flavour!) 1 medium Onion, Diced 3 sm. Cloves Garlic, Minced 1/4 cup Celery, Diced 1 1/2 cup Beef Au Jus Sauce or Beef Gravy 3/4 tsp Salt 1/4 tsp Black pepper 6 Whole Cloves or 1/2 tsp Ground Cloves 1/2 tsp Cinnamon 1/2 tsp Nutmeg 1 tsp Sage 3/4 cup Mashed Potatoes 1/4 cup Lightly Packed, Fresh GF Bread Crumbs
Preheat an oven to 400F. Roll the pastry dough into 2 equal-sized circles to fit a 9-inch pie pan. Line the bottom of the pie pan with 1 circle and set aside the prepared pie pan and remaining pastry for later.
Using a large skillet, heat the oil over medium-high heat and sauté the beef, onion, garlic, and celery until the vegetables are tender and the meat is mostly cooked. Drain any excess fat from the pan. Add the beef stock, herbs, and spices to the meat and vegetables; simmer the mixture over low-medium heat, covered, for about 15 to 20 minutes. Remove the skillet from the heat and stir the mashed potatoes and dry breadcrumbs into the mixture. Allow the meat filling to sit for 3 minutes. Spoon the filling into the prepared pie pan and top with the remaining pastry dough. Crimp the dough shut, flute the edges, cut vents in the top, and bake the pie for 12 minutes. Reduce the oven heat to 350F and continue baking the pie for 25 to 30 minutes, until the pastry is golden brown. Merry Christmas
|

| 10/31/2015 | 1 Min Read |
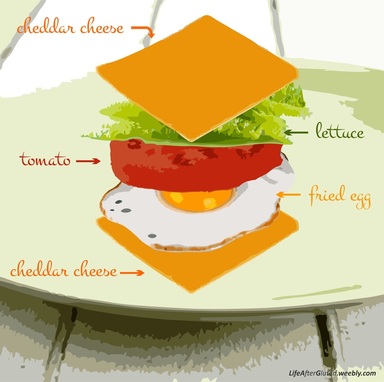
When it came so did a side of creativity. I took a few bites of my sausage and realized that this plate of sausage, fried eggs, broad cheddar cheese, lettuce, and tomato slices could easily be turned in to a GF sandwich with cheese bread! How so? Simple layer a slice of cheese with one egg, one slice tomato, one leaf lettuce and top with another slice of cheese. Now you have a fried egg sandwiched in cheese! It turned out grand, the cheese held together up until the very last bite. Go ahead try it next time you're out, almost all restaurants have these basic items. Just make sure the egg isn't too hot when you compile your sandwich r the cheese will begin to melt.
Remember gluten free doesn't mean your limited you're free! So use a little creativity and you'll enjoy your meals a lot more.
Sincerely, Tamara Green
Sorry for the delay in this post but I was too busy making this entire Greek menu! I hope you enjoy it as much as my family and I did!
Why did I choose to make an entire Greek meal? After reading about Greek mezethes from Georgia A and writing last weeks post about how I love making authentic ethnic cuisine, I felt like creating a Greek menu plan of my own; and so here it is!*
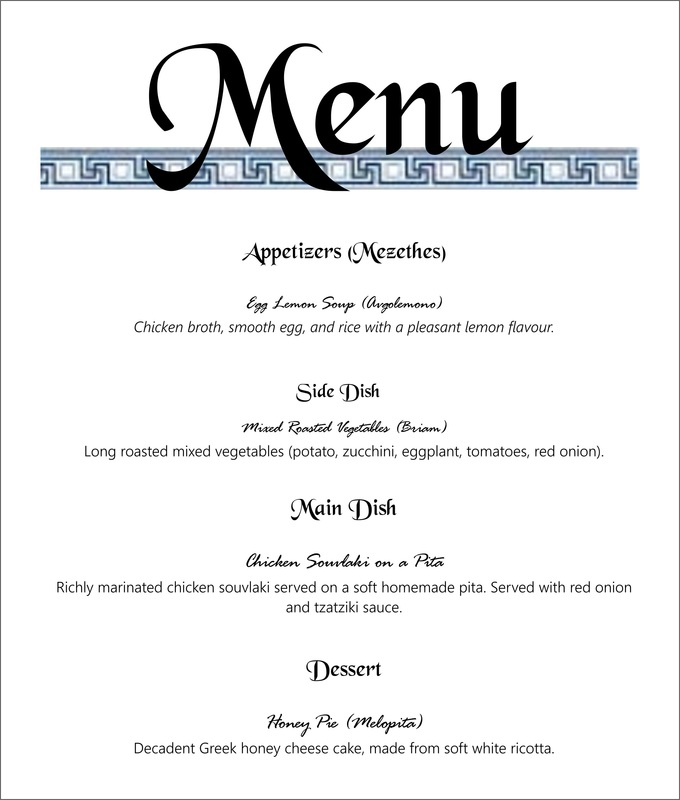
Appetizer (Meze): Egg Lemon Soup (Avgolemono)
Side Dish: Mixed Roasted Vegetables (Briam)
Main Dish: Chicken Souvlaki on a GF Pita
Tzatziki (Cucumber-Yogurt Sauce)
Dessert: Honey Pie (Melopita)
My family agrees that we prefer the melopita recipe from Food By Country but the ricotta one is still good and probably more authentic but tastes more like a dessert omelet than a cake (perhaps use one less egg?).
Need some help planning when to make these dishes?

- The GREEN denotes when you will be actively involved in making the recipe (e.g. stirring, measuring, fast pace cooking/baking).
- The RED denotes when you can take it slow on a particular recipe (e.g. the items is roasting, marinating, rising, etc.)
- And of course WHITE denotes when nothing is being done on that recipe at all!
I served the egg lemon soup at 5:00 as an appetizer and the main course and vegetables at 6:00 and lastly the dessert at 7:00 pm.


Happy to meet you,
If you are that person with a million and one allergies and intolerance I am there to say you are not alone! Life After Gluten can be better than life with wheat. Living lactose-free since 2007 and gluten-free since 2013. Also intolerant and/or allergic to mushrooms, soy, and yeast.
Your Blogger, Tamara Green
Categories
All
About Gluten
Autumn
Baking Advise
Best Hot Chocolate
Beverage
Bread
Breakfast
Cake
Charity
Christmas
Cookbook
Cookie
Dairy Free
Dairy-free
Dessert
Dinner
Grocery List
Holiday's
Hungarian
Lunch
Menu
Pastry
Pie
Plating
Product Review
Recipe
Review
Squares
Starting GF Diet
Summer
Thanksgiving
Utensils
Video
 RSS Feed
Archives
March 2024
March 2022
February 2022
November 2021
June 2021
December 2020
November 2020
October 2020
September 2020
August 2020
July 2020
May 2017
April 2017
August 2016
June 2016
May 2016
April 2016
March 2016
February 2016
January 2016
December 2015
November 2015
October 2015
September 2015
August 2015
July 2015
June 2015
May 2015
April 2015
