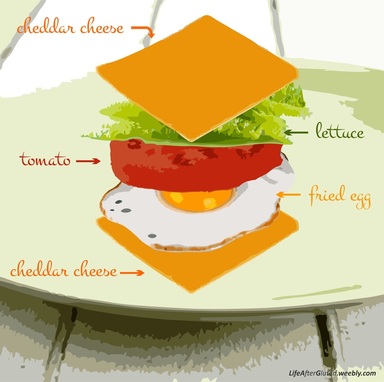
 The other day, my mom and I were in town and decide to stop off at a little restaurant for lunch. They had no gluten free sandwiches so I decided to have there “low carb” breakfast. When it came so did a side of creativity. I took a few bites of my sausage and realized that this plate of sausage, fried eggs, broad cheddar cheese, lettuce, and tomato slices could easily be turned in to a GF sandwich with cheese bread! How so? Simple layer a slice of cheese with one egg, one slice tomato, one leaf lettuce and top with another slice of cheese. Now you have a fried egg sandwiched in cheese! It turned out grand, the cheese held together up until the very last bite. Go ahead try it next time you're out, almost all restaurants have these basic items. Just make sure the egg isn't too hot when you compile your sandwich r the cheese will begin to melt. Remember gluten free doesn't mean your limited you're free! So use a little creativity and you'll enjoy your meals a lot more. God bless your whole face!
Sincerely, Tamara Green
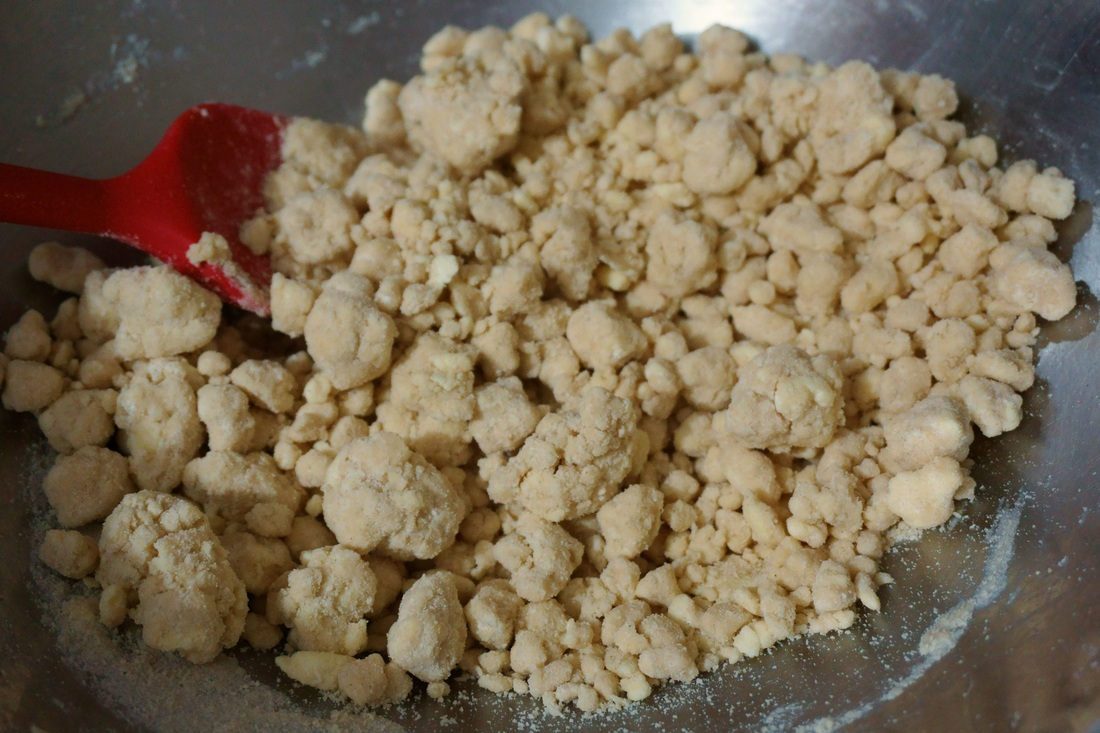
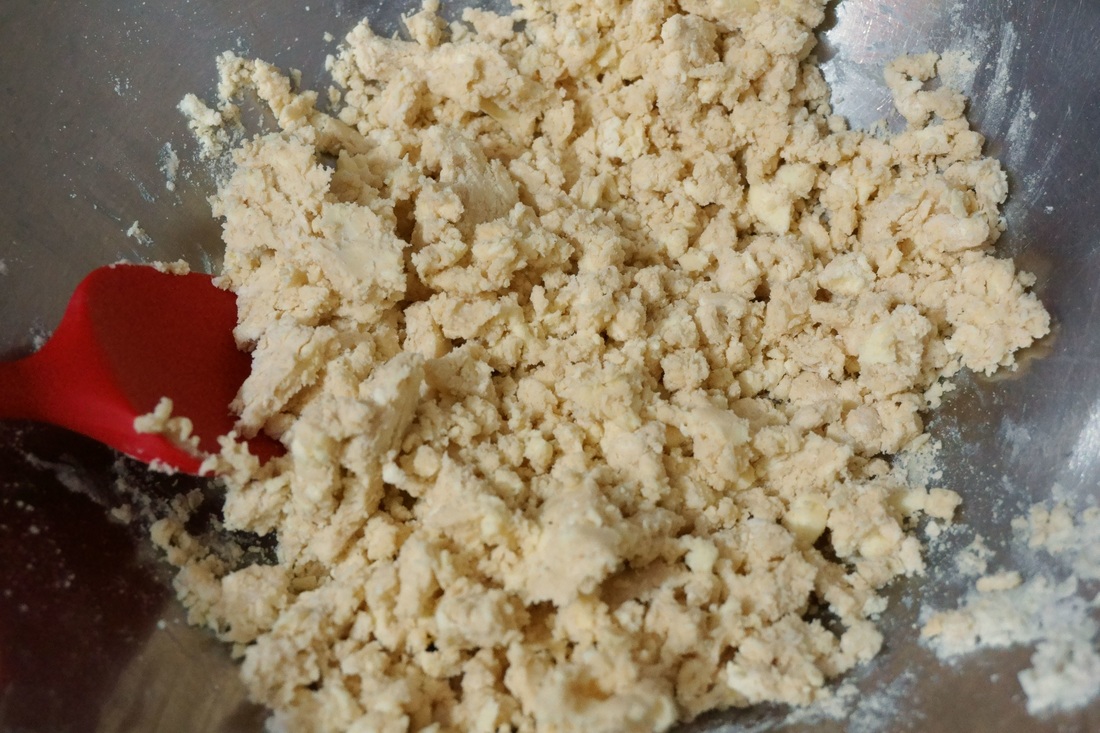
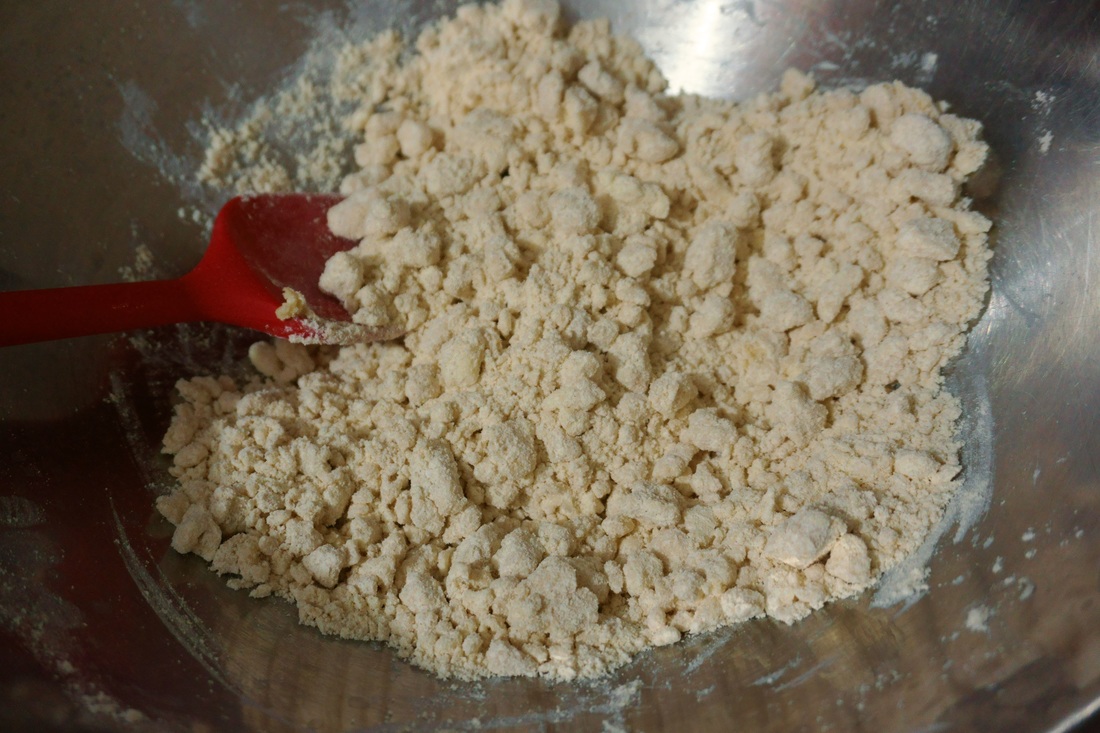
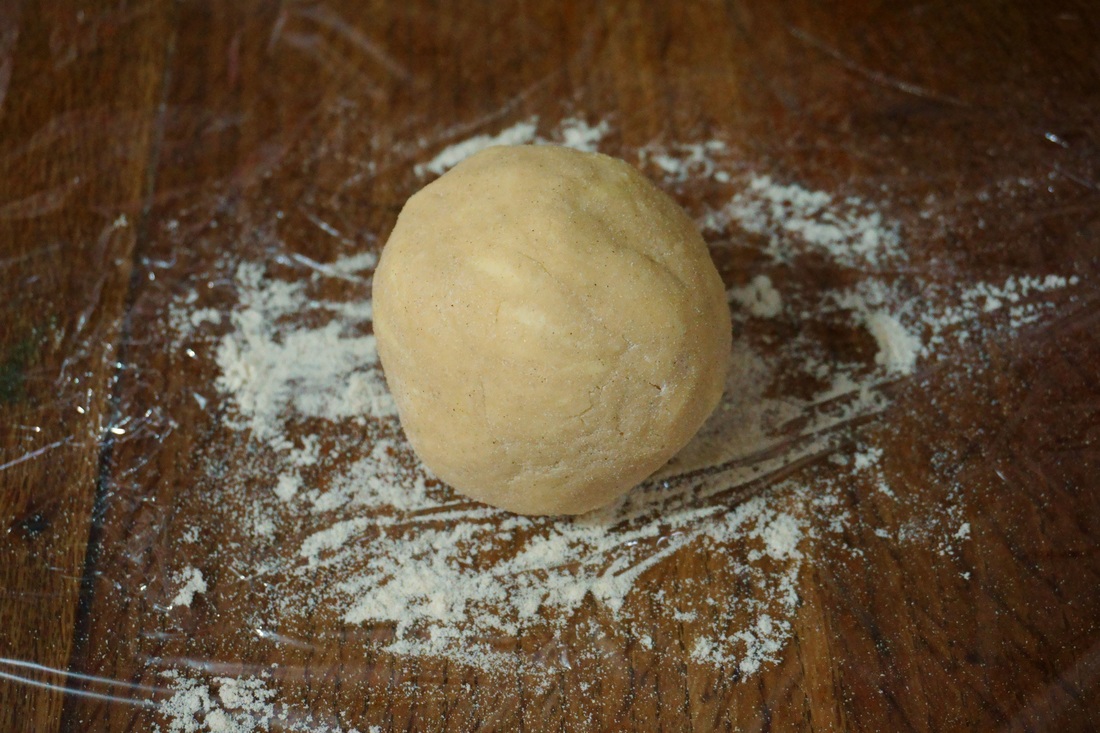
 It's getting close to that gingerbread season so now's the time to test dozen of different recipes and find the perfect one for your Christmas holiday treats! This the version my family made last year with great success I hope your family enjoys it too! 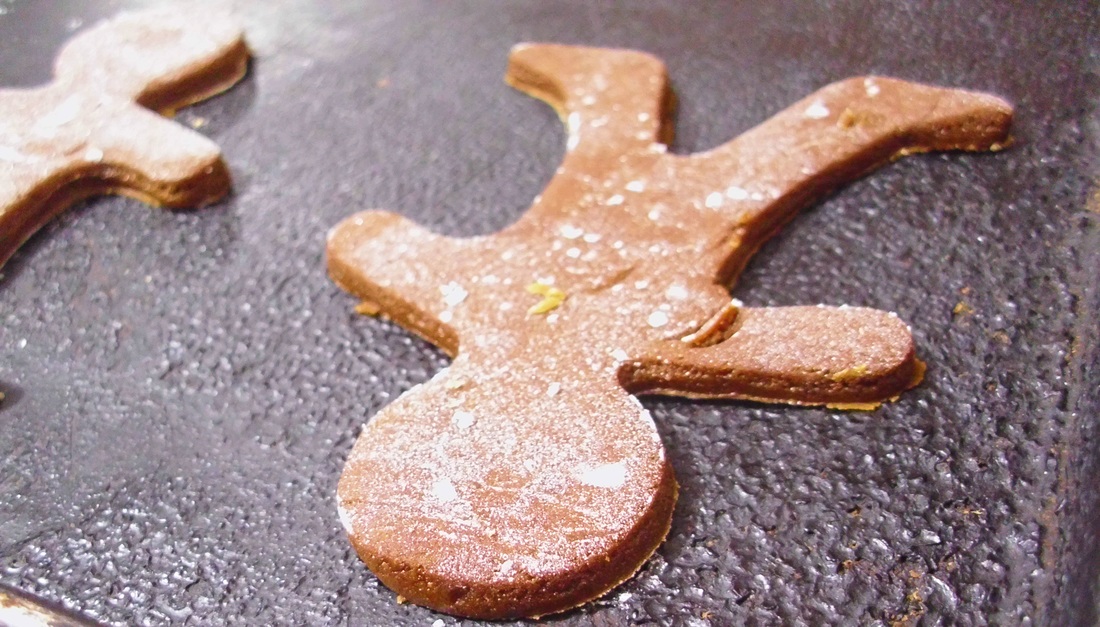 INGREDIENTS 4 tablespoons Unsalted Butter, room temperature 1/2 cup, packed Brown Sugar 1/2 cup Molasses 1/4 cup Honey 1 large Egg, room temperature 2 cups Brown Rice Flour 1 1/3 cup + 2 tsp Tapioca Starch/Flour 1/3 cup + 2 tsp Potato Starch 1/4 cup Teff Flour 1/4 cup Whey, Hemp, or Non-GMO Soy Protein 1 tsp Baking Soda 1 tsp Ginger powder 1/2 tsp Cinnamon, ground 1/4 tsp Cloves, ground 1/4 tsp Allspice, ground 1/2 tsp Salt 1/8 tsp Black Pepper (for spicy cookies!) 1/4 cup Water 2 tsp freshly grated Ginger Root, peeled DIRECTIONS In the bowl of a stand mixer with the paddle attachment (in a large bowl with a hand-held electric mixer, or in a large bowl using a whisk or spatula), cream the butter and brown sugar. Mix in the molasses and honey. Add the egg, mixing until combined. (Don't worry if the mixture looks curdled) In a medium bowl, sift together the flours, baking soda, spices, and salt & pepper. Add half of the flour mixture to the sugar mixture, mixing on low speed until just combined, scrape down the side of the bowl and/or paddle as is needed. Pour in the water and grated ginger, and mix to combine. Add the remaining flour and mix until fully combined. Divide the dough into two pieces (it's going to be sticky), and shape into a ball, wrap each in plastic wrap, and refrigerate for 3 to 4 hours, or overnight. Preheat oven to 350f (175C). Have ready parchment- or wax paper-lined baking sheets.
Bake cookies for 8-10 minutes, or until their surface is dry and they indent only slightly when you gently touch them, but are not yet beginning to get noticeably darker. (Unless of course you want a crispy gingerbread cookie. In that case just bake them longer and you'll end up with cookies strong enough to use for a gingerbread house!) Cool completely on a rack, then decorate as desired. Cookies keep, wrapped airtight and at room temperature, for up to three days. 
 Do you like mixing with wooden spoons? I find myself strangely uncomfortable with a wooden spoon. It's partially strange because I love grass roots, I'm no pioneer but I still very much want to be in touch with tangible reality and wooden spoons seem so much more country old time (what grandma used to use), ya know? BUT regardless the curvature and density of wooden spoons makes me feel distant/out-of-touch with the dough I am mixing, that's why I'm adverse to wooden spoons.
All that said I can't mix a great big batch sticky bread dough with a little dinner spoon! So I have always been left to the wooden spoon as my only alternative. BUT HORRAY! Those days are gone for good now that the "spoonatula" has walked into my life! The spoonatula, a cross between a spoon and spatula, is the best option for stirring baking goods I've found yet. The spoon part has a much wider surface area than your average spoon making it ideal for incorporating air into dough/batter when fold with it. Also it makes cleaning out the bowl 10x more efficient (that means your cake can be a little larger or perhaps your can make one or two more cookies). So next time you're in a dollar store, grocery store, or cooking shop pick yourself up one of these handy Spoon-Spatula's! 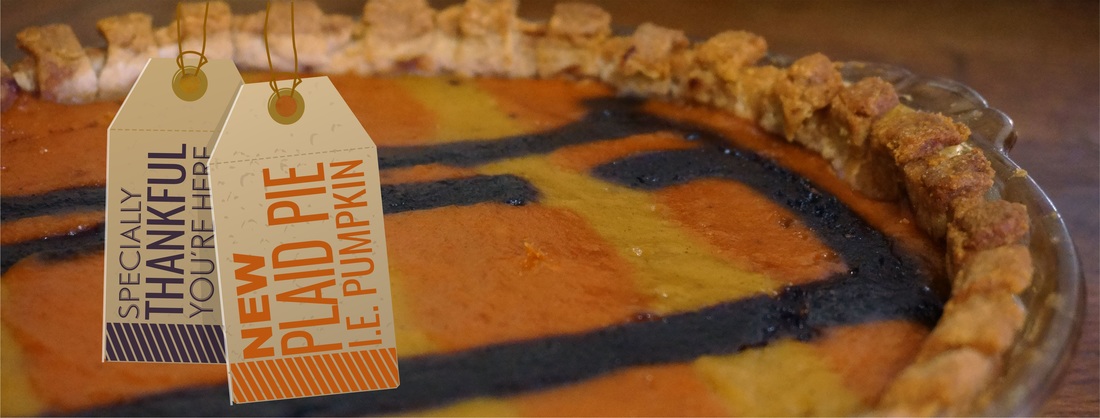
Making the same dishes every single Thanksgiving getting too routine for you. You want to tamper with your pumpkin pie recipe just a little but you don't want to stray from tradition.
If that's you (or if your Scottish) than this plaid pie is for you! This pie is an innovation of the comforting pumpkin pie. Don't worry it hasn't lost it's comfort! It's made from your traditional pumpkin pie filling as well as acorn squash and purple carrots. With a careful technique you can weave any plaid, striped, spotted, picturesque design you want! AND there's a special bonus advantage to making this plain pie and that is: IT'S FUN TO SAY "PLAID PIE!" So are you ready expand Thanksgiving tradition this year? Yes? Then lets get start with making this unique plaid pie.
Puree Method
Preheat oven to 165C (325F).
Wash and dry the sugar pumpkin, acorn squash, and carrot. Cut around the stem of the pumpkin then cut it in half and remove the seeds. Repeat with squash. Line two baking dishes with aluminum foil (one large and one small a bread pan will do). Lightly oil the foil. Place the pumpkin & squash halves cut side down on the foil in the larger pan. Place the peel carrot in the smaller pan. Bake for 40 minutes. The vegetables will be ready when the flesh easily gives when poke with a fork. Cool at room temperature. Use a fork or spoon to scrape the pumpkin flesh from the peel. Repeat with acorn squash. Mash or puree the acorn squash in a blender. Set aside and mash or puree pumpkin. Be careful not to mix any of the squash, pumpkin, or carrot unless otherwise noted because we want each puree to remain unique in hue. Drain any carrot juice from the pan into a small bowl. If the juice amounts to 30ml or 2 tbsp then discard carrot. Mix carrot juice with 1/2 cup pumpkin puree. If there isn't this much carrot juice then cut carrot into small chunks and mash or puree with 1/2 cup pumpkin. Set puree's aside.
Crust Method
Pan #1
Line one bread pan with aluminum foil, be sure to fit the foil tightly in the corners. Line foil with plastic wrap. Fill with all pumpkin filling. Place in freezer for 2 hours or until the consistency of a fudge-sicle or yogurt Popsicle. Make it remains level. Pan #2 Line the next pan with foil being careful to make a side 1” in from the pan's wall. Line with plastic wrap. Fill with all acorn squash filling. Place in freezer for 2 hours or until the consistency of a fudge-sicle or yogurt Popsicle. Make it remains level. Pan #3 Line the last pan with foil being careful to make a side 2” in from the pan's wall. Line with plastic wrap. Fill with carrot-pumpkin filling. Place in freezer for 2 hours or until the consistency of a fudge-sicle or yogurt Popsicle. Make it remains level. 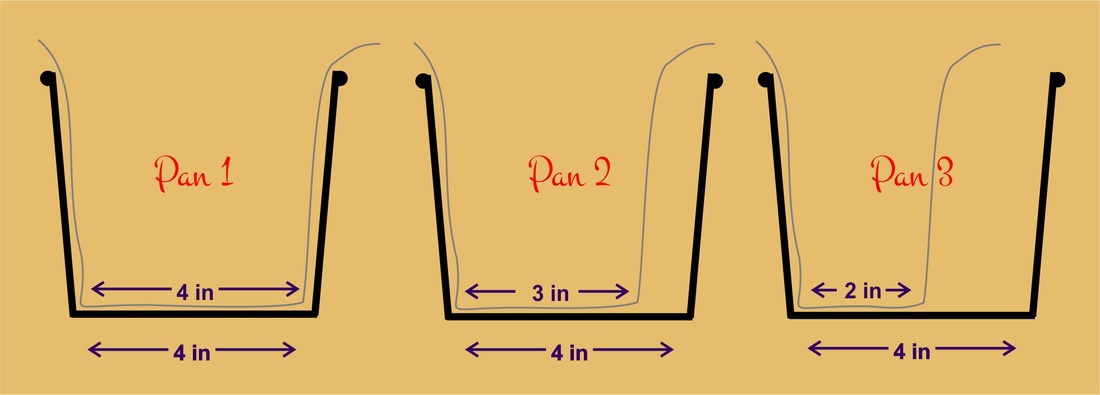
Filling Method
Crack 2 eggs open into a medium bowl. Separate the yolk from the white of a 3rd egg and add egg yolk to bowl. Slightly beat the eggs. Add 2/3 cup evaporated milk. Stir well.
In a small bowl mix 1 cup dark brown sugar, 1 tbsp sorghum flour, 1/2 tsp salt, 1 tsp ground cinnamon, 1/4 tsp ground nutmeg, 1/4 tsp ground ginger, one pinch ground cloves. Mix the wet and dry ingredients completely. Pour 1/4 cup of mixture into a small bowl (this should equal 1/6 of the mixture). Pour 1/2 cup into another small/medium bowl. The remaining amount of mixture should be 3/4 cup. Stir well 2 cups pumpkin puree into the largest bowl (3/4 cup of mixture). Stir well 1 cup acorn squash puree into the medium sized bowl (1/2 cup mixture). Stir well carrot/pumpkin puree into the smallest bowl (1/4 cup mixture). You should now have one orange, one caramel and one purple coloured filling.
Plaid Pattern Method

First, you have to choose what kind of plaid pattern you wish to make then you can remove your frozen fillings from the freezer. There are so many types of plaid patterns to choose from but our pumpkin, squash, and carrot-pumpkin fillings are in a ratio 3:2:1 respectively. So we're going to want the pumpkin filling stripes to be three times wider than the carrot-pumpkin. To make things a little easier here's my suggested blueprints (of course you'll need to adjust it slightly according to the size of your pie).

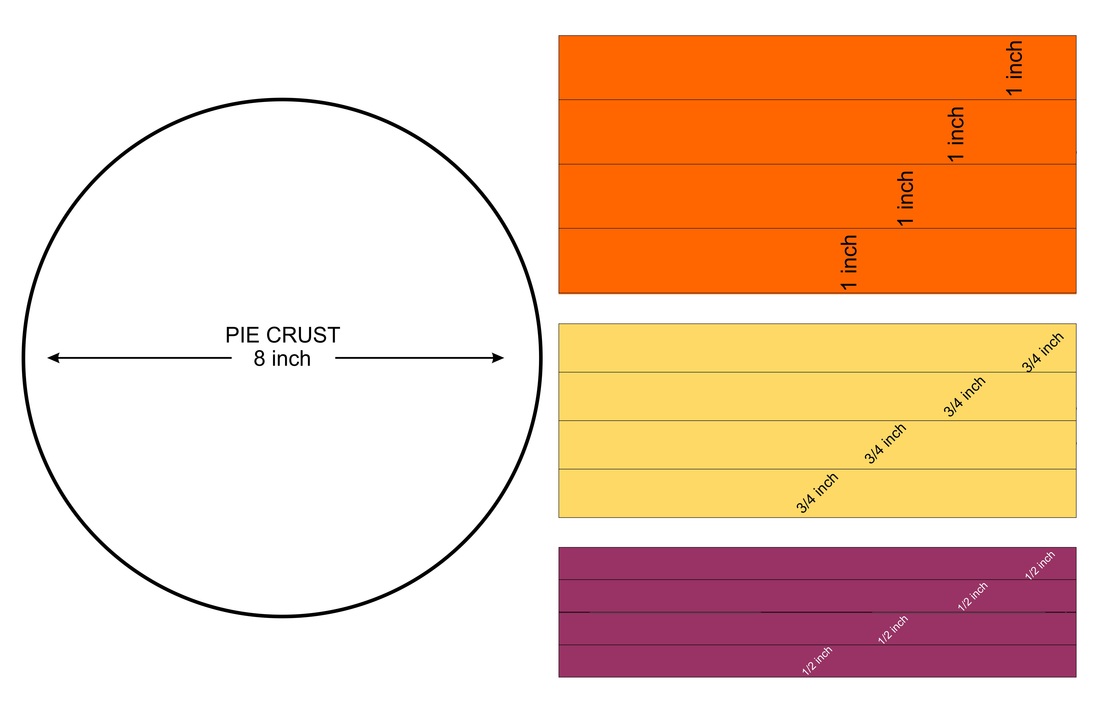
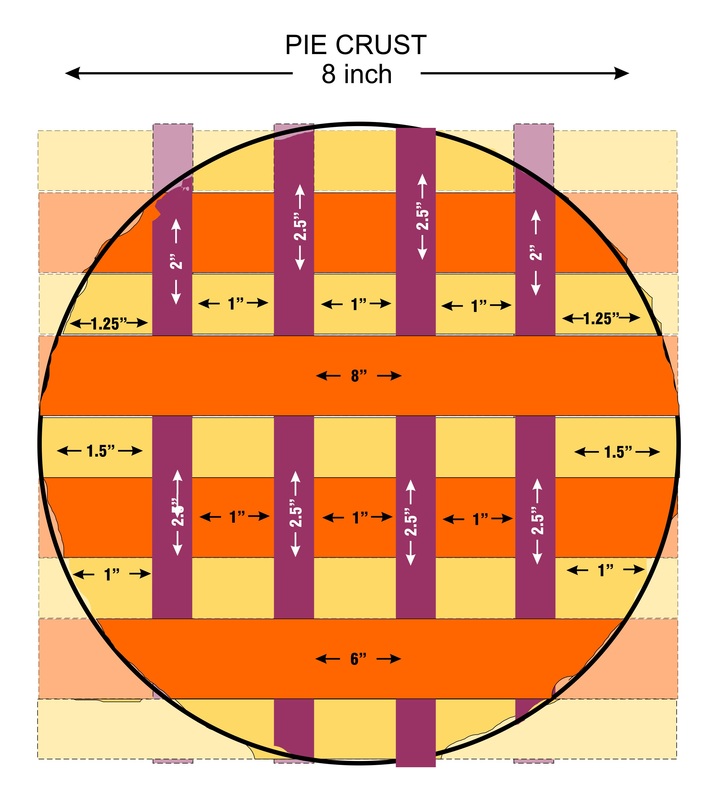
The light coloured areas outside of the pie's circumference are representing what will need to be trimmed from each strip of filling.
Puree Method
Preheat oven to 325 F (165 C).
Wash and dry the sugar pumpkin, acorn squash, and carrot. Cut around the stem of the pumpkin then cut it in half and remove the seeds. Repeat with squash. Line two baking dishes with aluminum foil (one large and one small a bread pan will do). Lightly oil the foil. Place the pumpkin & squash halves cut side down on the foil in the larger pan. Place the peel carrot in the smaller pan. Bake for 40 minutes. The vegetables will be ready when the flesh easily gives when poke with a fork. Cool at room temperature. Use a fork or spoon to scrape the pumpkin flesh from the peel. Repeat with acorn squash. Mash or puree the acorn squash in a blender. Set aside and mash or puree pumpkin. Be careful not to mix any of the squash, pumpkin, or carrot unless otherwise noted because we want each puree to remain unique in hue. Drain any carrot juice from the pan into a small bowl. If the juice amounts to 30ml or 2 tbsp then discard carrot. Mix carrot juice with 110 g pumpkin puree. If there isn't this much carrot juice then cut carrot into small chunks and mash or puree with 110 g pumpkin. Set puree's aside.
Crust Method
Filling Method
Pan #1
Line one bread pan with aluminum foil, be sure to fit the foil tightly in the corners. Line foil with plastic wrap. Fill with all pumpkin filling. Place in freezer for 2 hours or until the consistency of a fudge-sicle or yogurt Popsicle. Make it remains level. Pan #2 Line the next pan with foil being careful to make a side 2.5 cm from the pan's wall. Line with plastic wrap. Fill with all acorn squash filling. Place in freezer for 2 hours or until the consistency of a fudge-sicle or yogurt Popsicle. Make it remains level. Pan #3 Line the last pan with foil being careful to make a side 5 cm from the pan's wall. Line with plastic wrap. Fill with carrot-pumpkin filling. Place in freezer for 2 hours or until the consistency of a fudge-sicle or yogurt Popsicle. Make it remains level.
Plaid Pattern Method

First, you have to choose what kind of plaid pattern you wish to make then you can remove your frozen fillings from the freezer. There are so many types of plaid patterns to choose from but our pumpkin, squash, and carrot-pumpkin fillings are in a ratio 3:2:1 respectively. So we're going to want the pumpkin filling stripes to be three times wider than the carrot-pumpkin. To make things a little easier here's my suggested blueprints (of course you'll need to adjust it slightly according to the size of your pie).
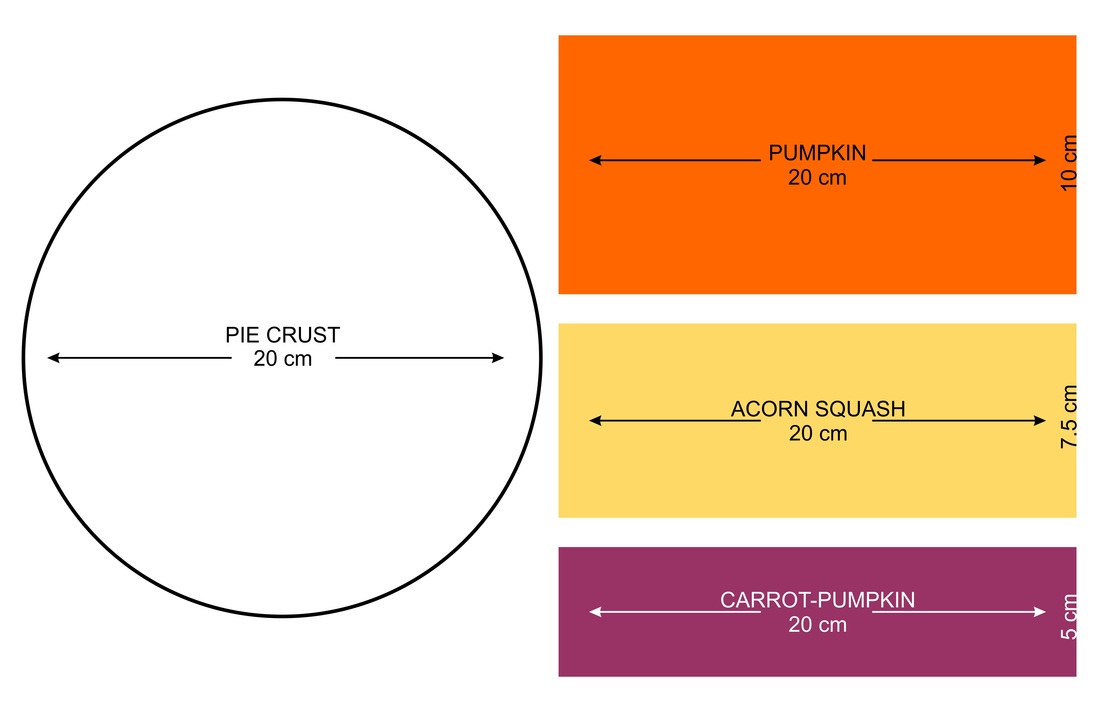
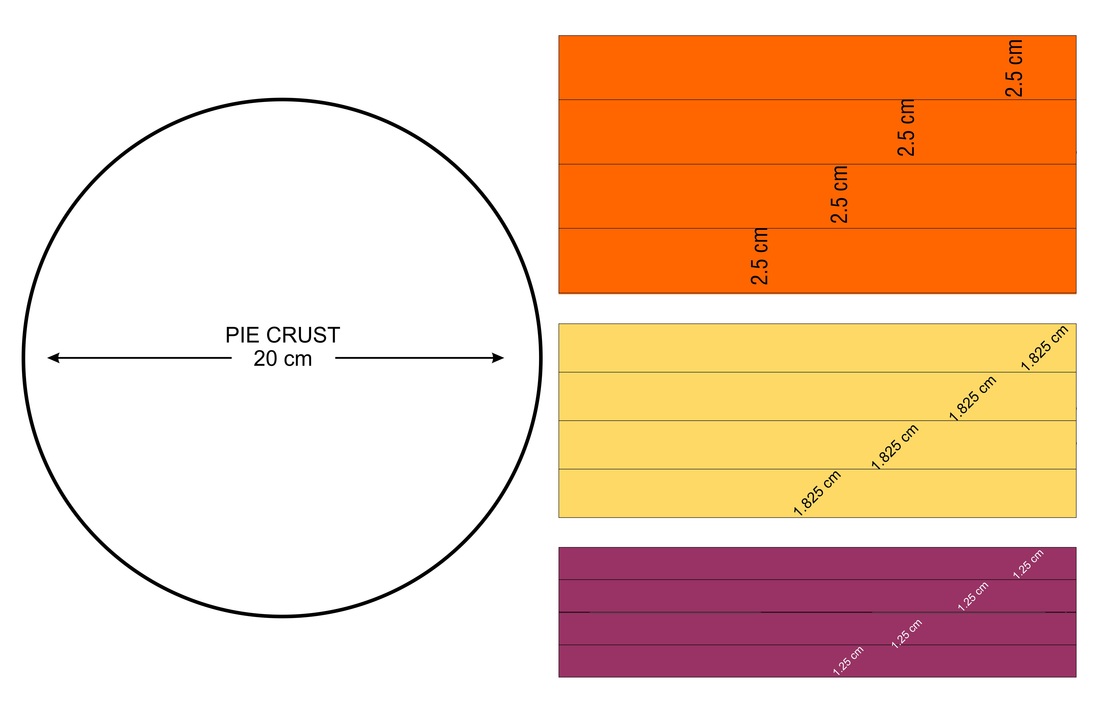

The light coloured areas outside of the pie's circumference are representing what will need to be trimmed from each strip of filling.
I do video work for GreenStreams Studio and am currently in the planning stages for shooting a video series on farming. Let's face it the general population doesn't know as much about farming as we did 100 years ago.
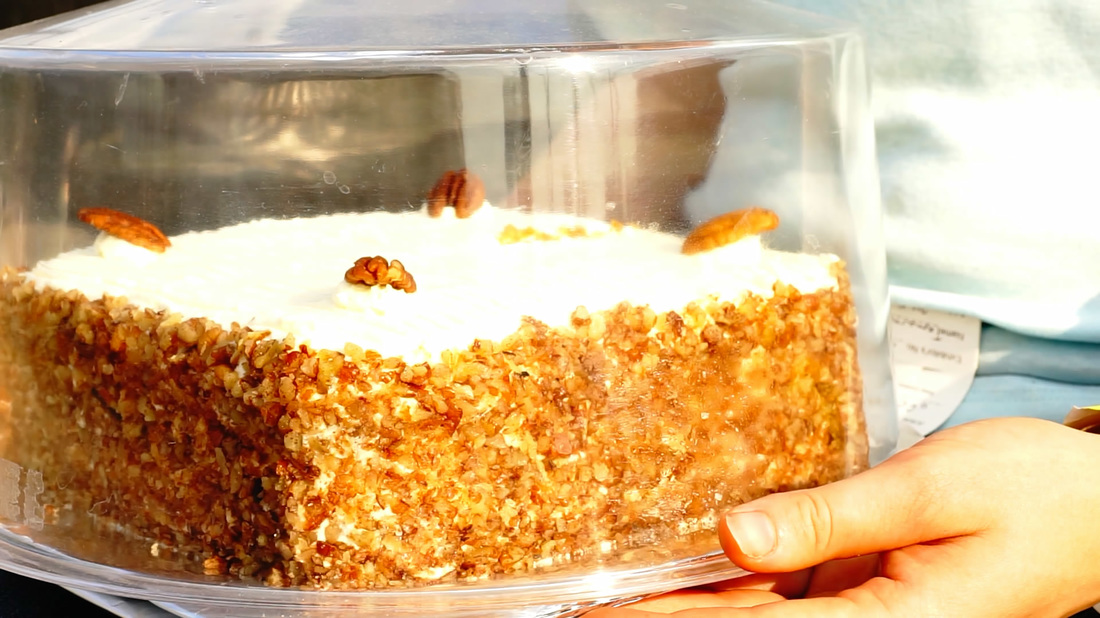
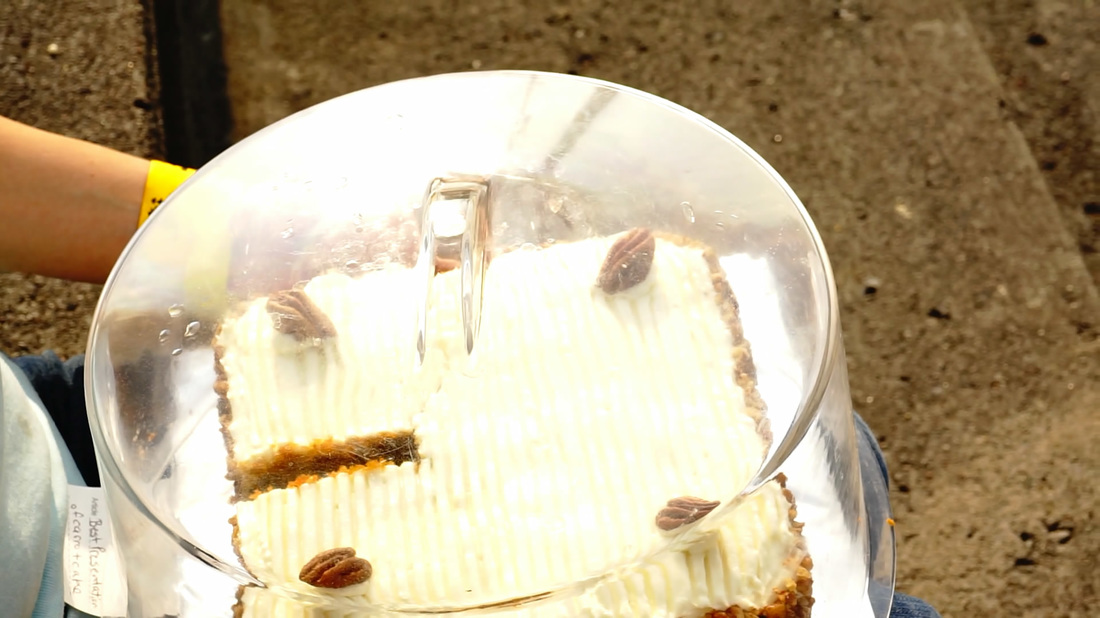
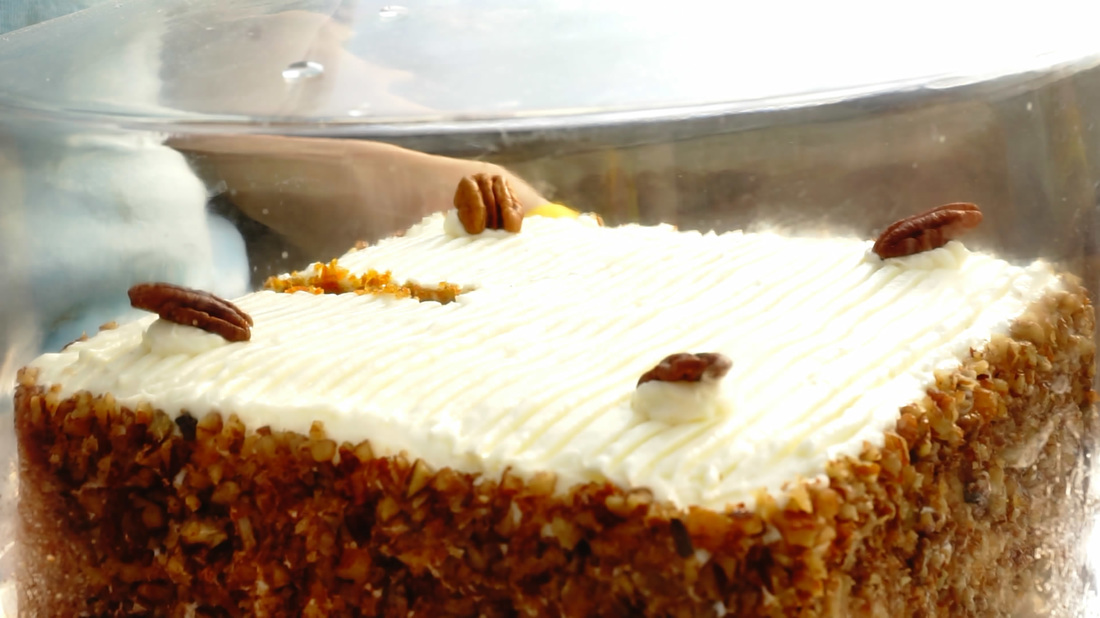
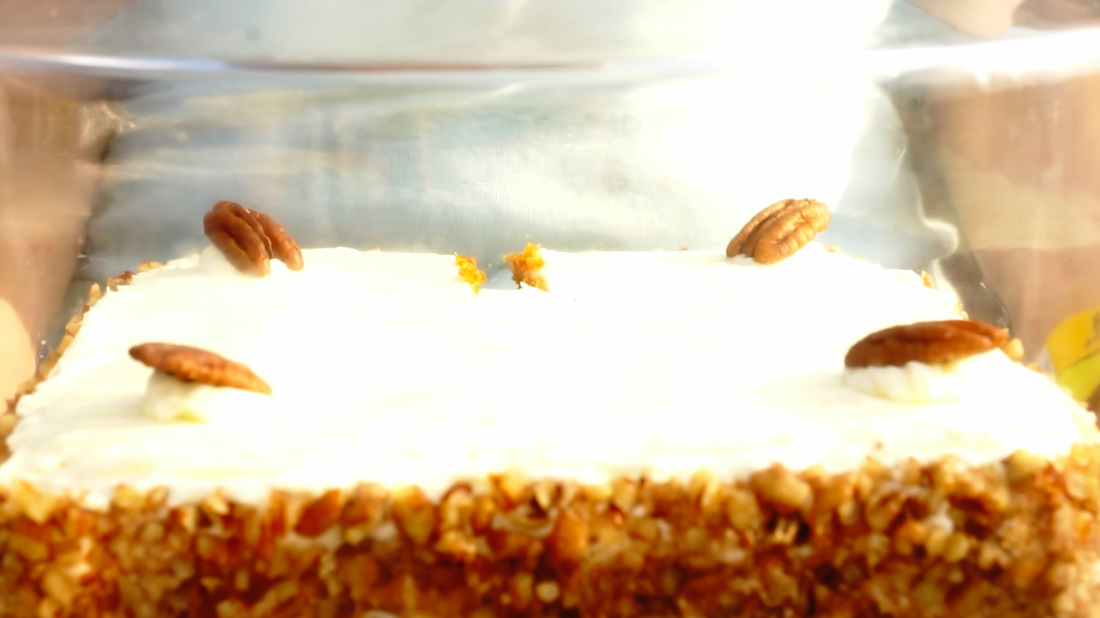
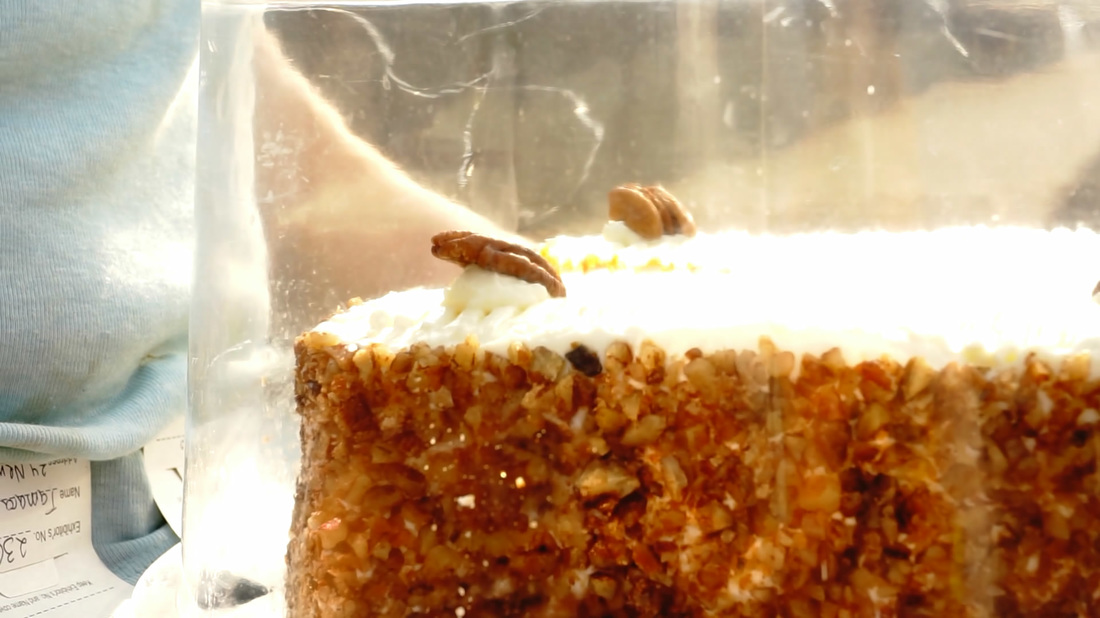
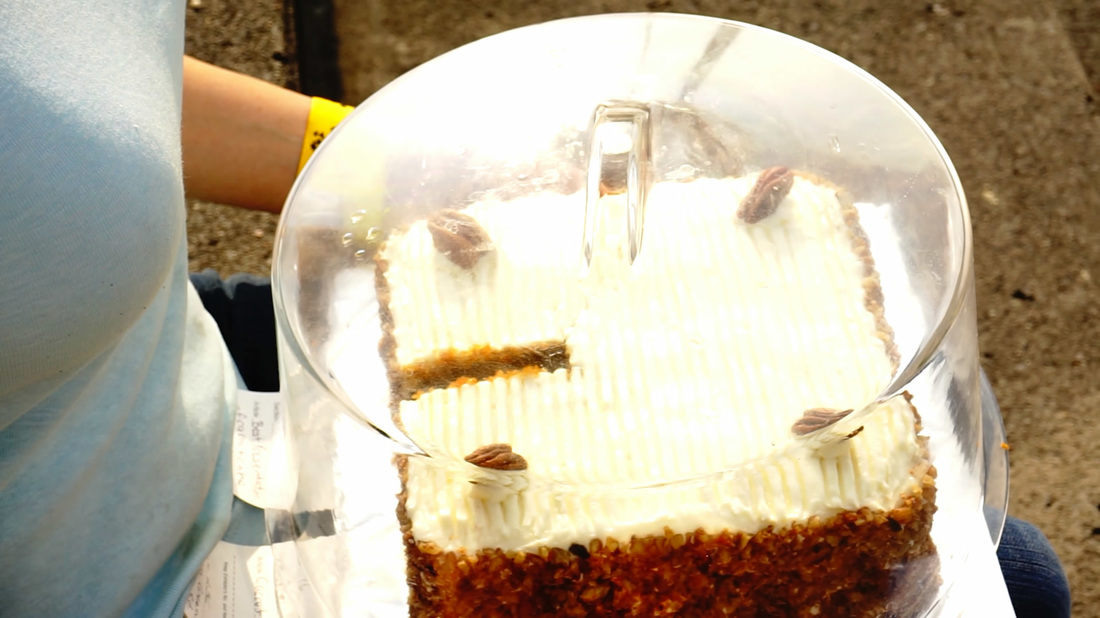
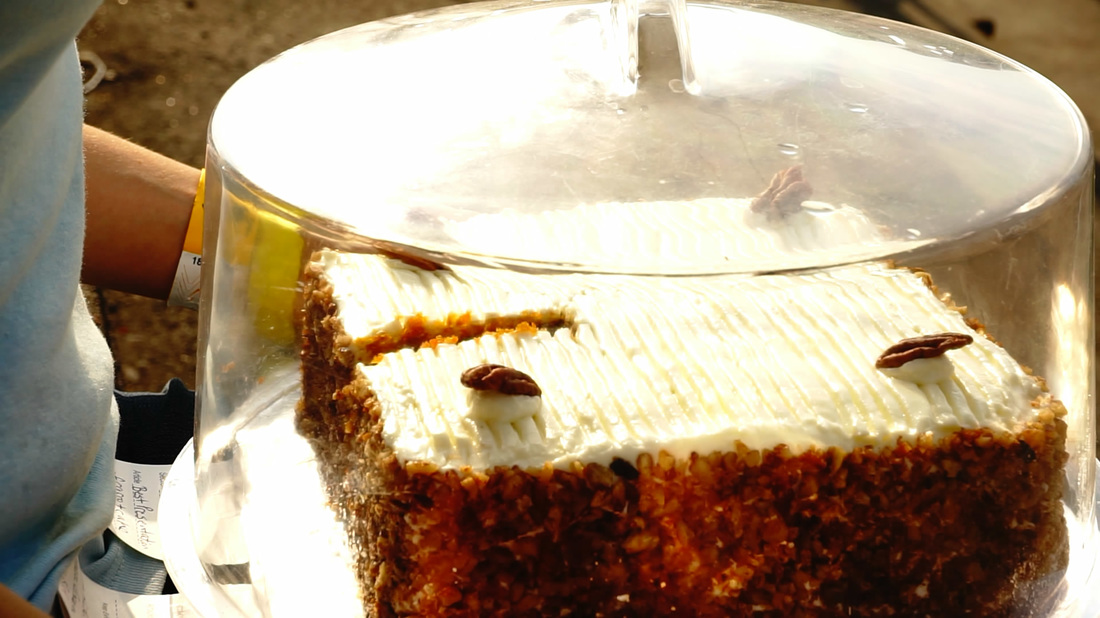
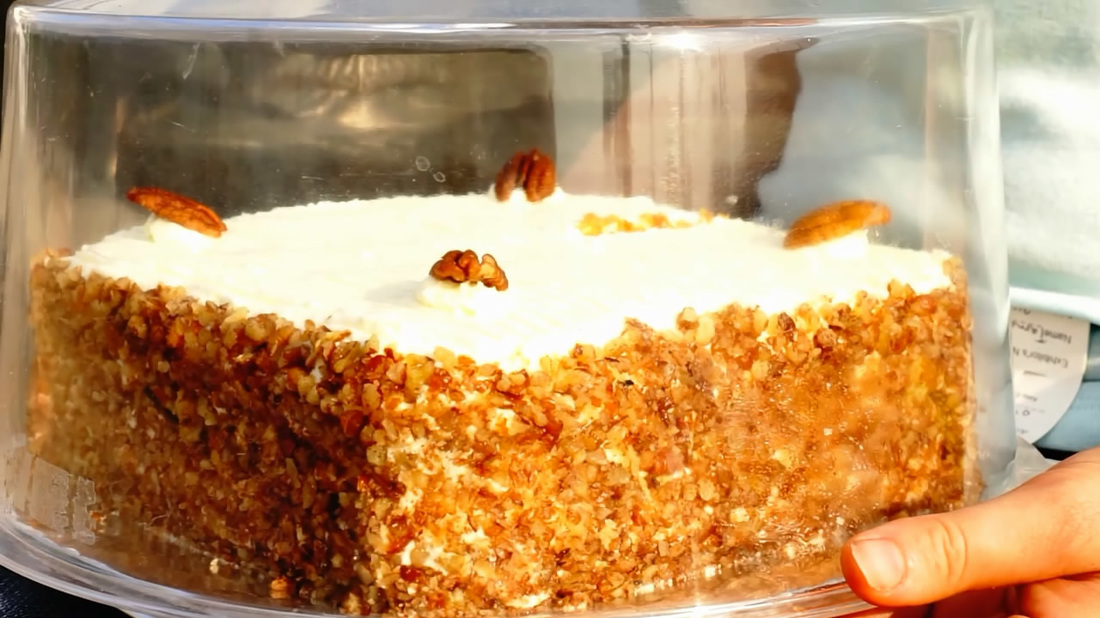
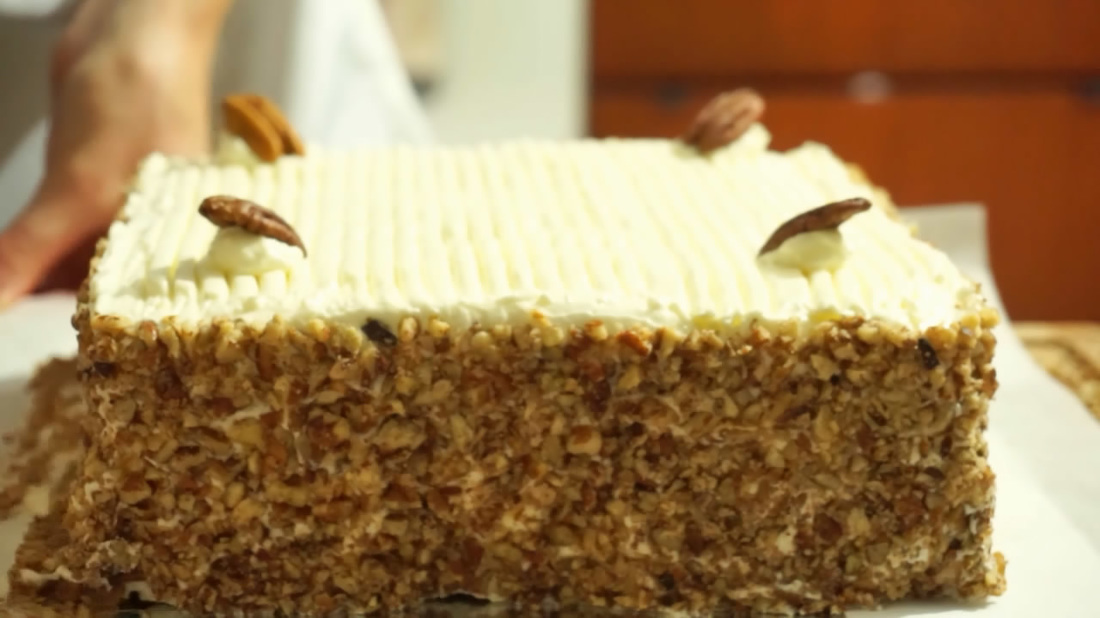
For those who haven't been following my carrot cake adventure I'll briefly tell you what it's been about... actually I wont because I have a video that does all of that! This video won second place in the Uxbridge Youth Film Festival so I hope you enjoy both the video and coming along with me in my GF carrot cake adventure. Here's a more complete interview with one of the two judges for the Port Perry Fair carrot cake competition: Here are the links to the articles I've posted regarding the "road to the carrot top" Carrot Cake (revision 1) I Want YOU To Help Me Make The Best GF Carrot Cake Ever! GF Carrot Cake To Compete Carrot Cake (revision 4)
Here's a cake that is right there with the best of the wheat flour made carrot cakes. Find out more about carrots here and how this recipe competed with 24 wheat mead cakes. It's written out in imperial and metric (scroll down). Enjoy! Imperial Measurements
Metric Measurements
|
 Click here for the best available price for a Digital Measuring Cup/Scale on Amazon.
Affiliate Links Disclaimer Life After Gluten receives a small commission from the sales made through our affiliate links. However, I only promote affiliate products that are relevant to the articles that brought you here. The commissions received through your purchases help maintain this site. Thank you for your support!

Happy to meet you,
If you are that person with a million and one allergies and intolerance I am there to say you are not alone! Life After Gluten can be better than life with wheat. Living lactose-free since 2007 and gluten-free since 2013. Also intolerant and/or allergic to mushrooms, soy, and yeast. Categories
All
Archives
March 2024
Affiliate Links Disclaimer Life After Gluten receives a small commission from the sales made through our affiliate links. However, I only promote affiliate products that are relevant to the articles that brought you here. The commissions received through your purchases help maintain this site. Thank you for your support!
|


 RSS Feed
Photo from Brett Jordan
